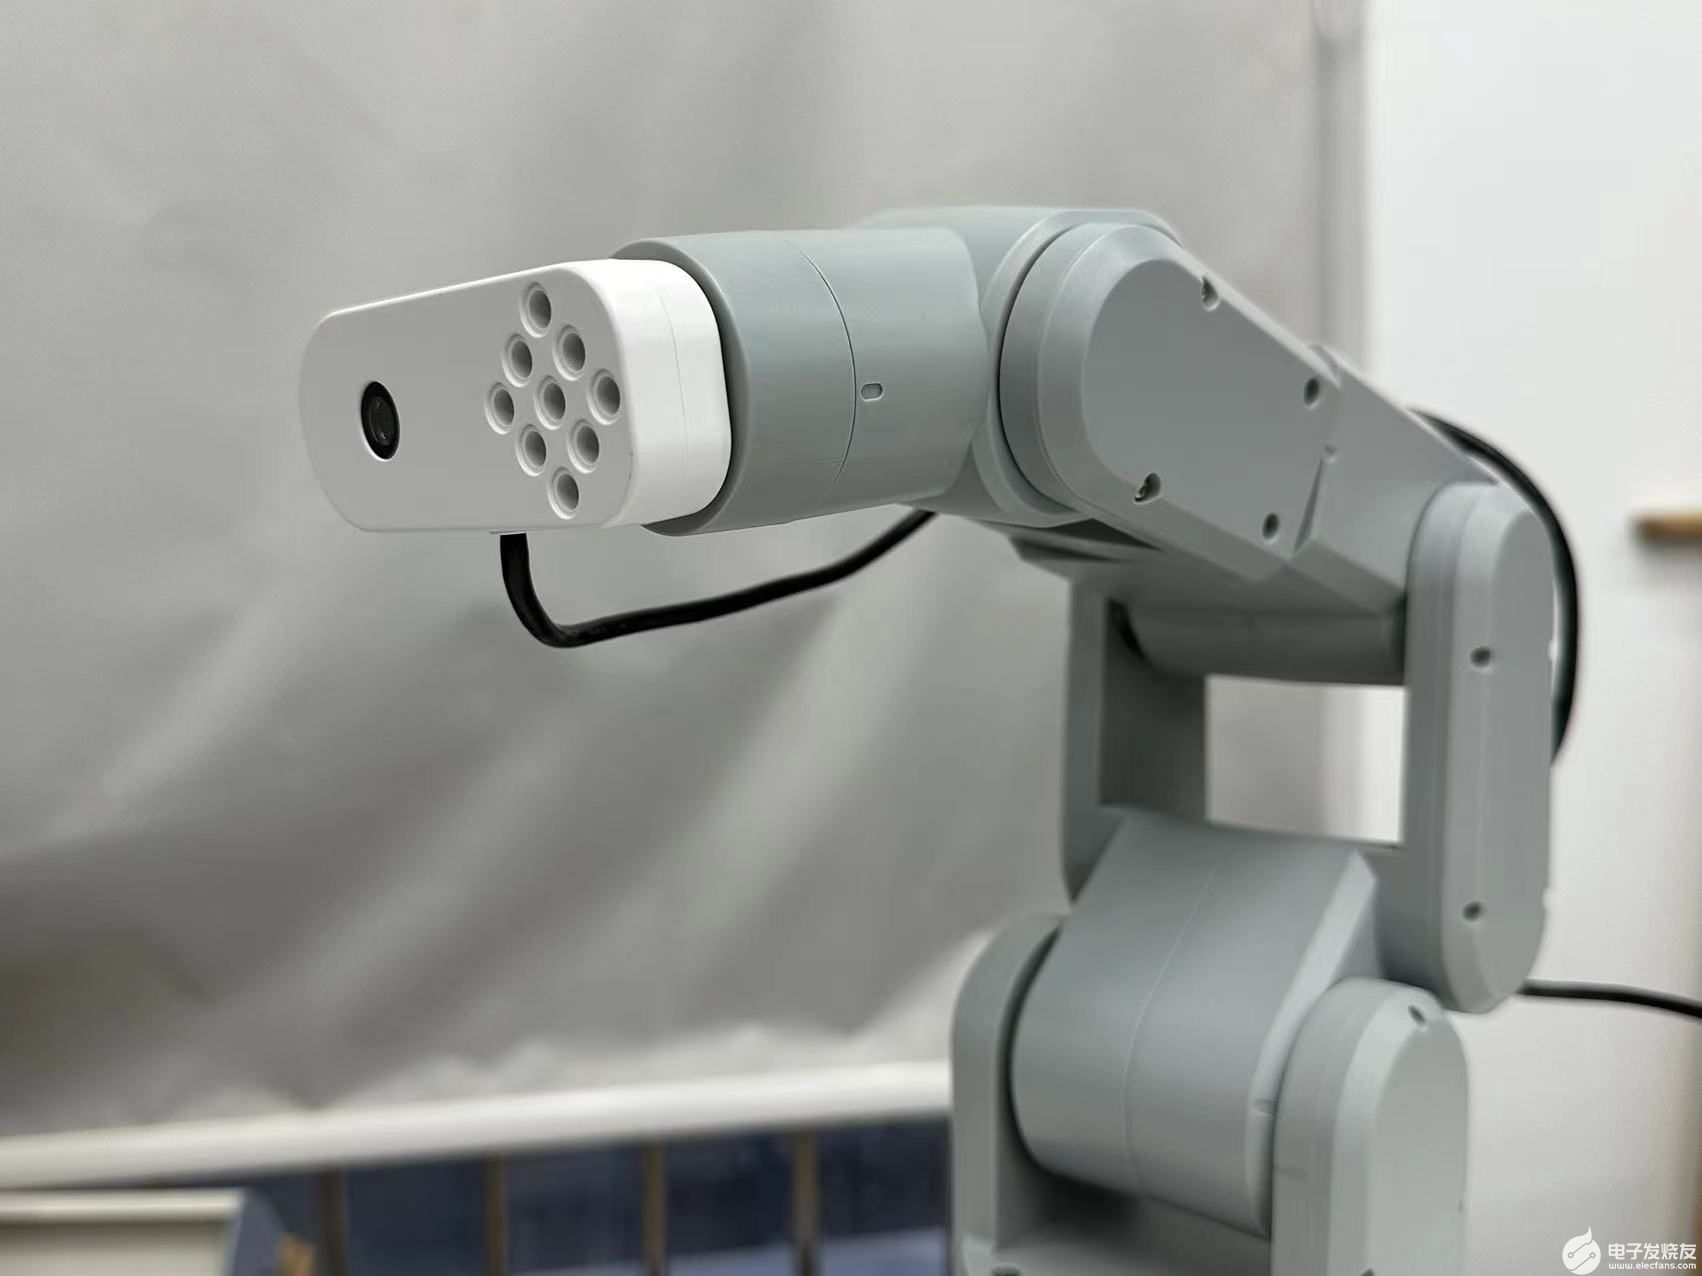
使用一個桌面型的六軸機械臂,在機械臂的末端安裝一個攝像頭,來進行人臉識別和跟蹤的一個功能。該功能分為兩個模塊,一個是人臉識別模塊,另一個是機械臂的運動控制模塊。
在前文有介紹到怎么控制機械臂的基本運動和人臉識別是如何實現的,在這里就不再復述了,本篇的內容主要是介紹是如何完成運動控制模塊的。
使用到的設備
mechArm 270 -Pi ,適配的攝像頭

設備的詳情可以了解前文
機械臂的運動控制模塊
接下來介紹運動控制的模塊。
控制模塊,常見的運動控制輸入的是笛卡爾空間的絕對位置,想要獲得絕對位置需要做相機和手臂的手眼標定算法,這個涉及的未知參數就有十幾個了,我們略過了這個步驟,選擇使用相對位移做運動控制,這就需要設計一套采樣運動機制,確保一次控制周期能完整地獲得人臉的偏移并實施跟蹤。
所以我想要整個功能能夠快速呈現出來,就沒有選擇用手眼標定的算法來處理相機和手臂的關系。因為手眼標定的工作量是相當龐大的。
code
_, img = cap.read()
# Converted to grey scale
gray = cv2.cvtColor(img, cv2.COLOR_BGR2GRAY)
# Detecting faces
faces = face_cascade.detectMultiScale(gray, 1.1, 4)
# Drawing the outline
for (x, y, w, h) in faces:
if w > 200 or w < 80:?
#Limit the recognition width to between 80 and 200 pixels
continue
cv2.rectangle(img, (x, y), (x+w, y+h), (255, 0, 0), 3)
center_x = (x+w-x)//2+x
center_y = (y+h-y)//2+y
size_face = w
將獲取到的 center_x,center_y ,size_face這幾個變量用來計算位置。
下面是處理數據來控制運動的算法的代碼
run_num = 20 #Control cycle of 20 frames
if save_state == False:
# Save a start point (save_x, save_y)
save_x = center_x
save_y = center_y
save_z = size_face
origin_angles = mc.get_angles()
print("origin point = ", save_x, save_y, origin_angles)
time.sleep(2);
current_coords = mc.get_coords()
save_state = TRUE
else:
if run_count > run_num: # Limit the control period to 20 frames
run_count = 0
# Recording relative offsets
error_x = center_x - save_x
error_y = center_y - save_y
error_z = size_face - save_z
# Pixel differences are converted into actual offsets, which can be scaled and oriented
trace_1 = -error_x * 0.15
trace_z = -error_y * 0.5
trace_x = -error_z * 2.0
# x/z axis offset, note that this is open loop control
current_coords[2] += trace_z
current_coords[0] += trace_x
#Restricting the Cartesian space xz range
if current_coords[0] < 70:
current_coords[0] = 70
if current_coords[0] > 150:
current_coords[0] = 150
if current_coords[2] < 220:
current_coords[2] = 220
if current_coords[2] > 280:
current_coords[2] = 280
# Inverse kinematic solutions
x = current_coords[0]
z = current_coords[2]
# print(x, z)
L1 = 100;
L3 = 96.5194;
x = x - 56.5;
z = z - 114;
cos_af = (L1*L1 + L3*L3 - (x*x + z*z))/(2*L1*L3);
cos_beta = (L1*L1 - L3*L3 + (x*x + z*z))/(2*L1*math.sqrt((x*x + z*z)));
reset = False
# The solution is only applicable to some poses, so there may be no solution
if abs(cos_af) > 1:
reset = True
if reset == True:
current_coords[2] -= trace_z
current_coords[0] -= trace_x
print("err = ",cos_af)
continue
af = math.acos(cos_af);
beta = math.acos(cos_beta);
theta2 = -(beta + math.atan(z/x) - math.pi/2);
theta3 = math.pi/2 - (af - math.atan(10/96));
theta5 = -theta3 - theta2;
cof = 57.295 #Curvature to angle
move_juge = False
# Limits the distance travelled, where trace_1 joint is in ° and trace_x/z is in mm
if abs(trace_1) > 1 and abs(trace_1) < 15:
move_juge = True
if abs(trace_z) > 10 and abs(trace_z) < 50:
move_juge = True
if abs(trace_x) > 25 and abs(trace_x) < 80:
move_juge = True
if (move_juge == True):
print("trace = ", trace_1, trace_z, trace_x)
origin_angles[0] += trace_1
origin_angles[1] = theta2*cof
origin_angles[2] = theta3*cof
origin_angles[4] = theta5*cof
mc.send_angles(origin_angles, 70)
else:
#Due to the open-loop control, if no displacement occurs the current coordinate value needs to be restored
current_coords[2] -= trace_z
current_coords[0] -= trace_x
else:
# 10 frames set aside for updating the camera coordinates at the end of the motion
if run_count < 10:
save_x = center_x
save_y = center_y
save_z = size_face
run_count += 1
在算法模塊中,獲得相對位移后如何進行手臂移動,為了確保運動效果我們并沒有直接采用mecharm提供的坐標運動接口,而是在python中添加了逆運動學部分,針對應用場景計算了特定姿態下的機械臂逆解,將坐標運動轉化成了角度運動,避免了奇異點等影響笛卡爾空間運動的因素。結合上人臉識別部分的代碼,整個項目就算是完成了。
正常來說人臉識別會對算力有比較高的要求,它的算法機制是針對相鄰像素做重復計算從而增加識別精度,我們使用的mechArm 270-Pi它的主控是以樹莓派4B 為處理器,來進行人臉識別的算力處理。
樹莓派的算力是400MHZ。我們用的樹莓派算力不足所以簡化了這個過程,把識別機制改成了只算幾次的模糊識別,在我們應用的時候就需要背景簡單一些。
總結
這個人臉識別和機械臂跟蹤項目到目前就算是做完了。
總結項目一些關鍵信息:
1 在對于低算力的情況下,設定簡單的使用場景,實現流暢的效果
2 將復雜的手眼標定算法換成選擇相對位置移動,使用采樣運動機制,確保每一控制周期能完整的獲得人臉的偏移并跟蹤
3 在python中添加了逆運動學部分,針對應用場景計算了特定姿態下的機械臂逆解,將坐標運動轉化成了角度運動,避免了奇異點等影響笛卡爾空間運動。
項目一些不足的地方:
在使用的場景有一定的要求,需要干凈的背景才能運行成功。(通過固定的場景,簡化了很多參數)
前面也有提到,樹莓派的算力是不足的,更換其他控制主板的,運行起來會更加流暢,例如用jetsonnano (600MHZ),高性能圖像處理的電腦。
另外就是運動控制模塊,因為沒有做手眼標定所以只能用相對位移,控制分為“采樣階段”“移動階段”,目前盡量要求采樣的時候鏡頭是靜止的,但實際上比較難保證鏡頭靜止,就會出現在采樣的時候鏡頭同時還在運動,導致讀到的坐標會有偏差。
最后,在這里特別感謝大象機器人在項目的開發時提供的幫助,能夠讓項目完成。這次使用的mechArm是一款中心對稱結構的機械臂,在關節運動上有所限制,如果將程序運用在活動范圍更加靈活的mycobot上可能是不一樣情況。
如果你對項目有啥想要了解更多的地方請在下方給我留言。
審核編輯黃宇
-
機器人
+關注
關注
211文章
28618瀏覽量
207912 -
python
+關注
關注
56文章
4806瀏覽量
84933 -
機械臂
+關注
關注
12文章
519瀏覽量
24663
發布評論請先 登錄
相關推薦
通過檢測手臂運動來控制機械臂
基于LabVIEW和SolidWorks改進機械臂的設計流程
基于LabVIEW的四自由度機械臂運動控制系統設計
采用LabVIEW實現四自由度機械臂運動控制系統設計
STM32與樹莓派交互控制機械臂
基于STC8H1K28雙軸機械臂驅動模塊設計
雙機械臂運動軌跡優化方法


 如何完成機械臂的運動控制模塊


評論