SyterKit是一個純裸機框架,可以用于TinyVision或者v851se/v851s/v853等芯片的開發板,SyterKit使用CMake作為構建系統構建,支持多種應用與多種外設驅動。同時SyterKit也具有啟動引導的功能,可以替代U-Boot實現快速啟動。
在開始系統構建前需要準備TinyVision開發板及如下線材,
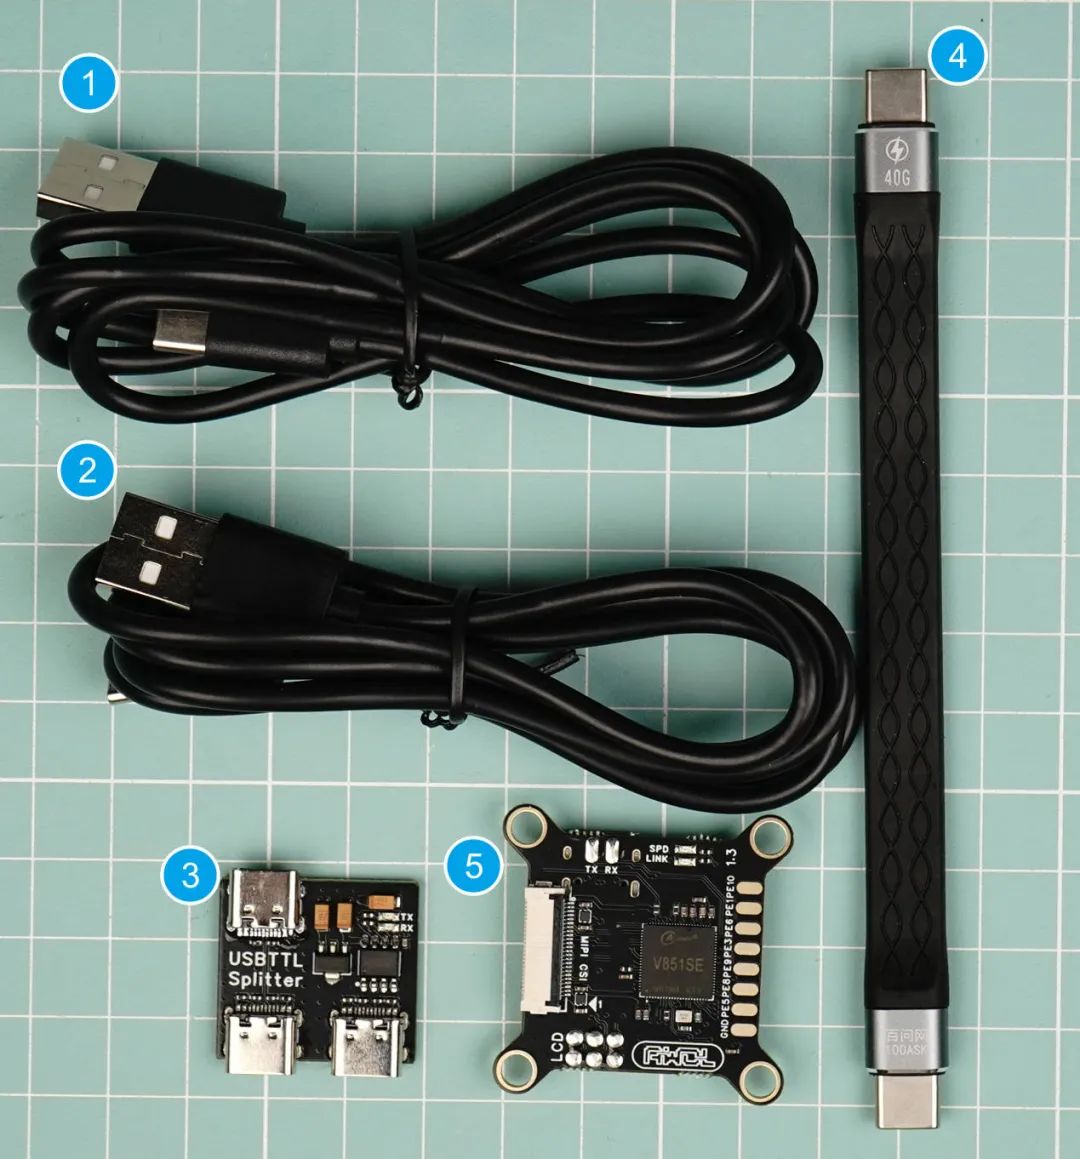
使用40Gbps數據線連接TinyVision開發板和TypeC-SUB調試器,如下圖所示:

使用兩條Type-C連接TypeC UART調試器和電腦端,連接完成后即可按照下文步驟構建系統。
從零構建SyterKit
構建 SyterKit 非常簡單,只需要在 Linux 操作系統中安裝配置環境即可編譯。SyterKit 需要的軟件包有:
gcc-arm-none-eabi
CMake
對于常用的 Ubuntu 系統,可以通過如下命令安裝:
sudo apt-get update
sudo apt-get install gcc-arm-none-eabi cmake build-essential -y
然后新建一個文件夾存放編譯的輸出文件,并且進入這個文件夾
mkdir build
cd build
然后運行命令編譯 SyterKit
cmake ..
make
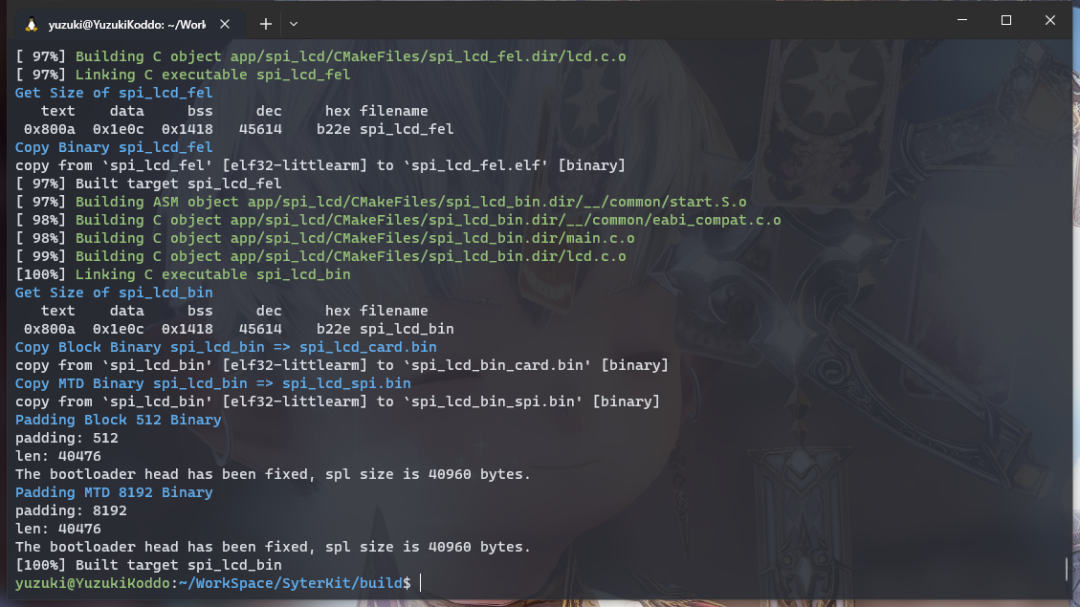 ??
??
編譯后的可執行文件位于 build/app 中,這里包括 SyterKit 的多種APP可供使用。

這里我們使用的是 syter_boot 作為啟動引導。進入 syter_boot 文件夾,可以看到這些文件

由于 TinyVision 是 TF 卡啟動,所以我們需要用到syter_boot_bin_card.bin
 ? ?
? ?
編譯Linux-6.1內核
由于 Debian 12 配套的內核是 Linux 6.1 LTS,所以這里我們選擇構建 Linux 6.1 版本內核。
搭建編譯環境
安裝一些必要的安裝包
sudo apt-get update && sudo apt-get install -y gcc-arm-none-eabi gcc-arm-linux-gnueabihf g++-arm-linux-gnueabihf build-essential libncurses5-dev zlib1g-dev gawk flex bison quilt libssl-dev xsltproc libxml-parser-perl mercurial bzr ecj cvs unzip lsof
獲取內核源碼
內核源碼托管在 Github 上,可以直接獲取到,這里使用--depth=1 指定 git 深度為 1 加速下載。
git clone http://github.com/YuzukiHD/TinyVision --depth=1
然后進入內核文件夾
cd kernel/linux-6.1
配置內核選項
應用 defconfig
CROSS_COMPILE=arm-linux-gnueabihf- make ARCH=arm tinyvision_defconfig
進入menuconfig配置選項
CROSS_COMPILE=arm-linux-gnueabihf- make ARCH=arm menuconfig
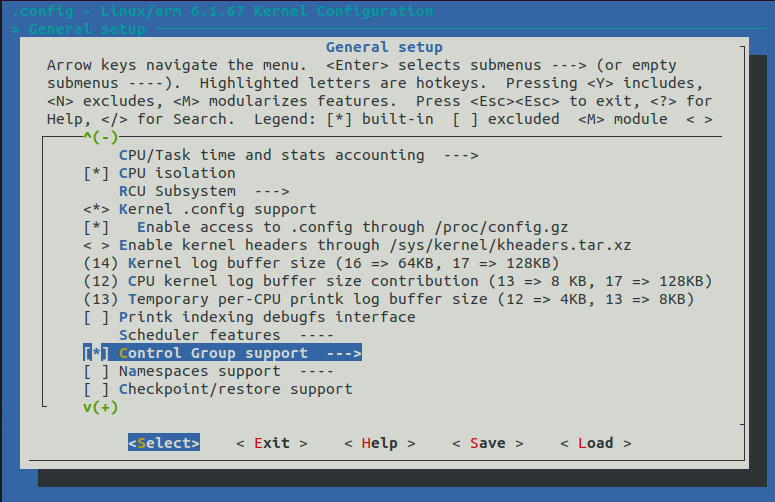
進入General Setup,
選中Control Group Support,

前往File Systems,
找到FUSE support,
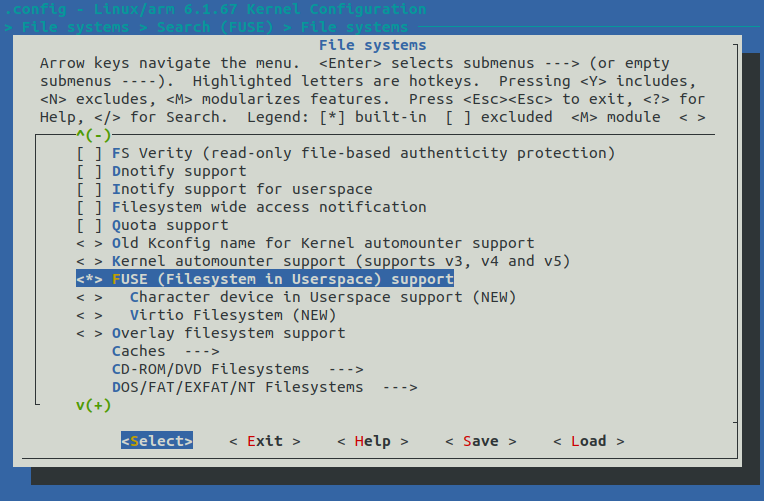
前往File Systems,
找到Inotify support for userspace,
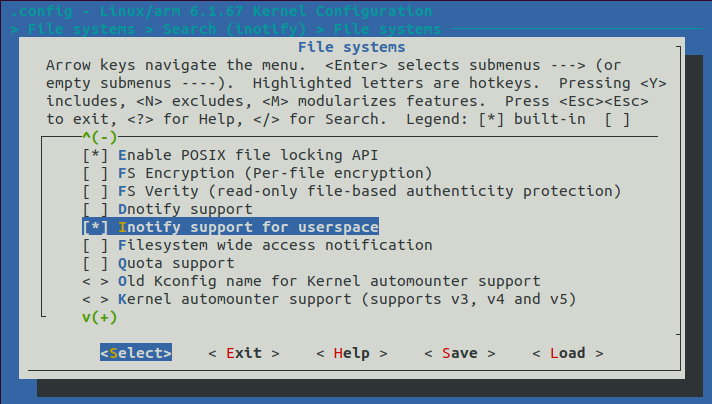
編譯內核
CROSS_COMPILE=arm-linux-gnueabihf- make ARCH=arm
使用debootstrap
構建debian rootfs
下載安裝依賴環境
sudo apt install debootstrap qemu qemu-user-static qemu-system qemu-utils qemu-system-misc binfmt-support dpkg-cross debian-ports-archive-keyring --no-install-recommends
生成目標鏡像,配置環境,這里我們生成一個 1024M 的鏡像文件用于存放 rootfs
dd if=/dev/zero of=rootfs.img bs=1M count=1024
mkdir rootfs
mkfs.ext4 rootfs.img
sudo mount rootfs.img rootfs
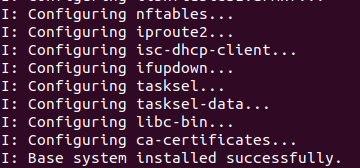
這里我們選擇最新的 debian12 (bookwarm) 作為目標鏡像,使用清華源來構建,輸出到目標目錄 rootfs_data 文件夾中。新版本的 debootstrap 只需要運行一次即可完成兩次 stage 的操作,相較于老版本方便許多。
sudo debootstrap --arch=armhf bookworm rootfs_data https://mirrors.tuna.tsinghua.edu.cn/debian/
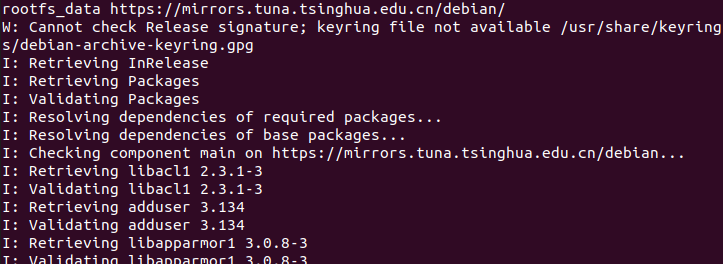 ??
??
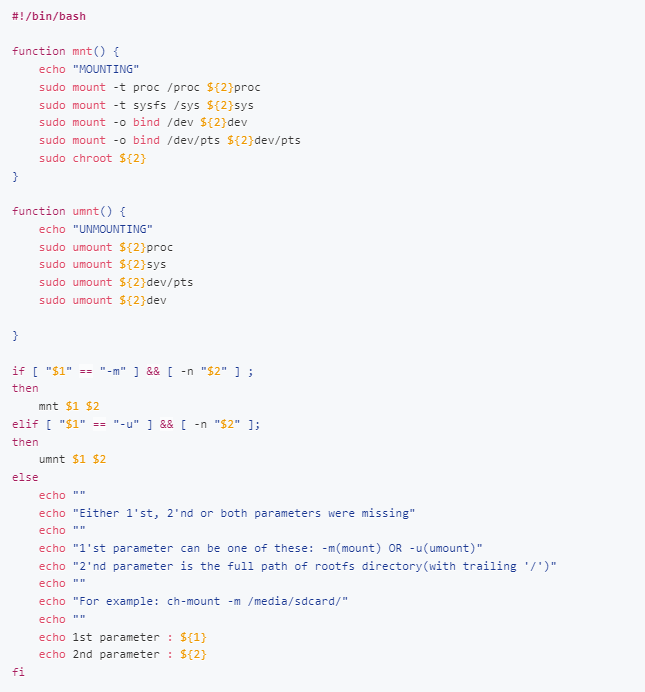
等待構建完成后,使用chroot進入到目錄,這里編寫一個掛載腳本方便掛載使用,新建文件 ch-mount.sh 并寫入以下內容:
然后賦予腳本執行的權限,執行掛載,可以看到進入了 debian 的 rootfs
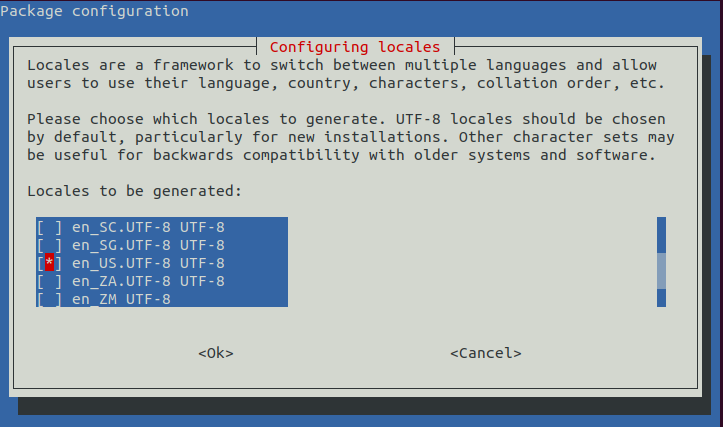
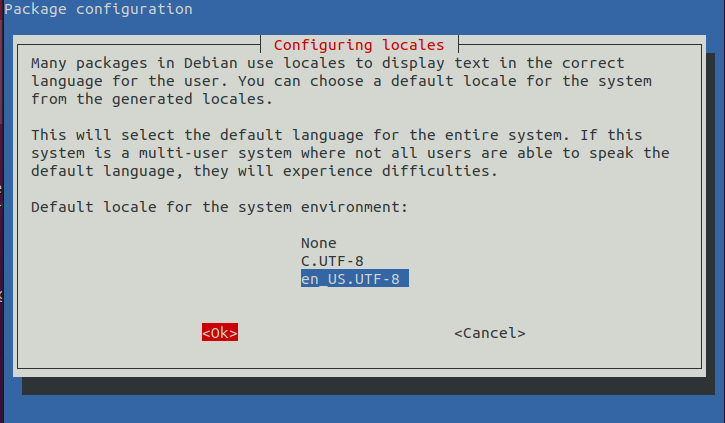
配置系統字符集,選擇 en_US 作為默認字符集,選擇一個就可以
export LC_ALL=en_US.UTF-8
apt-get install locales
dpkg-reconfigure locales
 ? ? ?
? ? ?  ?
?
安裝Linux基礎工具
apt install sudo ssh openssh-server net-tools ethtool wireless-tools network-manager iputils-ping rsyslog alsa-utils bash-completion gnupg busybox kmod wget git curl --no-install-recommends
安裝編譯工具
apt install build-essential
安裝Linux nerd工具
apt install vim nano neofetch
設置本機入口ip地址
cat </etc/hosts 127.0.0.1 localhost 127.0.1.1 $HOST ::1 localhost ip6-localhost ip6-loopback ff02::1 ip6-allnodes ff02::2 ip6-allrouters EOF
配置網卡
mkdir -p /etc/network cat >/etc/network/interfaces <
配置DNS地址
cat >/etc/resolv.conf <
配置分區
cat >/etc/fstab </dev/mmcblk0p1 /boot vfat defaults 0 0 /dev/mmcblk0p2 / ext4 defaults,noatime 0 1 EOF
配置root密碼
passwd
配置主機名
echo TinyVision > /etc/hostname
取消掛載chroot
./ch-mount.sh -u rootfs_data/
拷貝rootfs到鏡像中
sudo cp -raf rootfs_data/* rootfs
取消掛載
sudo umount rootfs
打包固件
完成以上步驟debian rootfs就制作好了。
編譯完成 bootloader,內核,rootfs 后,還需要打包固件成為可以 dd 寫入的固件,這里我們使用 genimage 工具來生成構建。
生成刷機鏡像
編譯內核后,就可以生成sun8i-v851se-tinyvision.dtb和zImage文件,我們把他們拷貝出來。
然后將sun8i-v851se-tinyvision.dtb改名為sunxi.dtb,這個設備樹名稱是定義在SyterKit源碼中的,如果之前修改了SyterKit的源碼需要修改到對應的名稱,SyterKit會去讀取這個設備樹。
然后編寫一個config.txt作為配置文件
[configs] bootargs=root=/dev/mmcblk0p2 earlyprintk=sunxi-uart,0x02500000 loglevel=2 initcall_debug=0 rootwait console=ttyS0 init=/sbin/init mac_addr=4a:13f9:79:75 bootdelay=3
安裝genimage作為打包工具。
sudo apt-get install libconfuse-dev #安裝genimage依賴庫 sudo apt-get install genext2fs # 制作鏡像時genimage將會用到 git clone https://github.com/pengutronix/genimage.git cd genimage ./autogen.sh # 配置生成configure ./configure # 配置生成makefile make sudo make install
編譯后運行試一試,這里正常
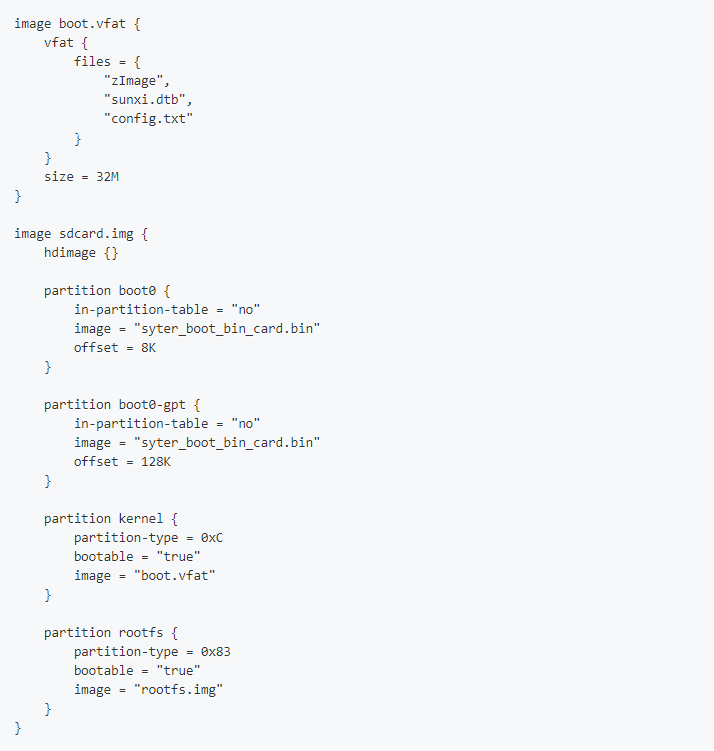
編寫 genimage.cfg 作為打包的配置
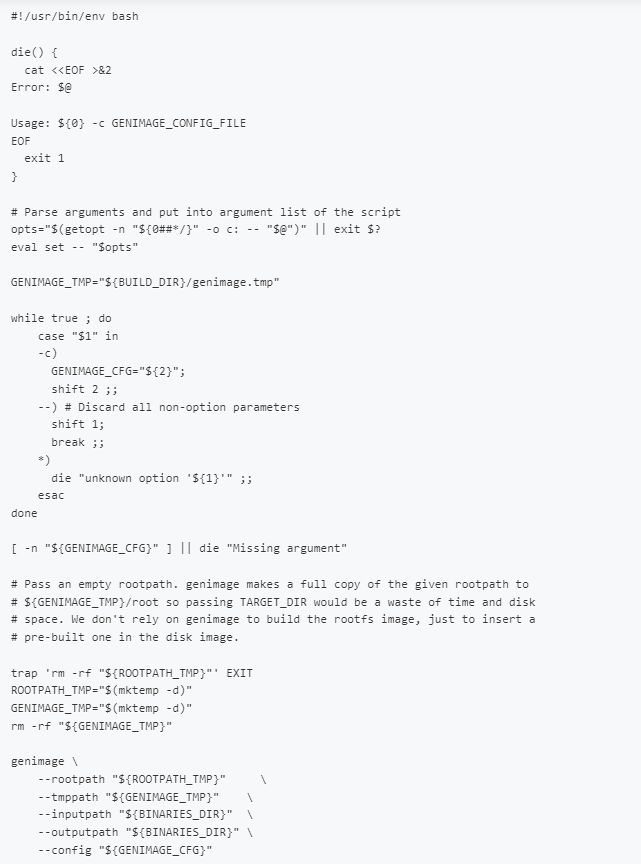
由于genimage的腳本比較復雜,所以編寫一個genimage.sh作為簡易使用的工具
準備完成,文件如下所示
運行命令進行打包
chmod 777 genimage.sh ./genimage.sh -c genimage.cfg?
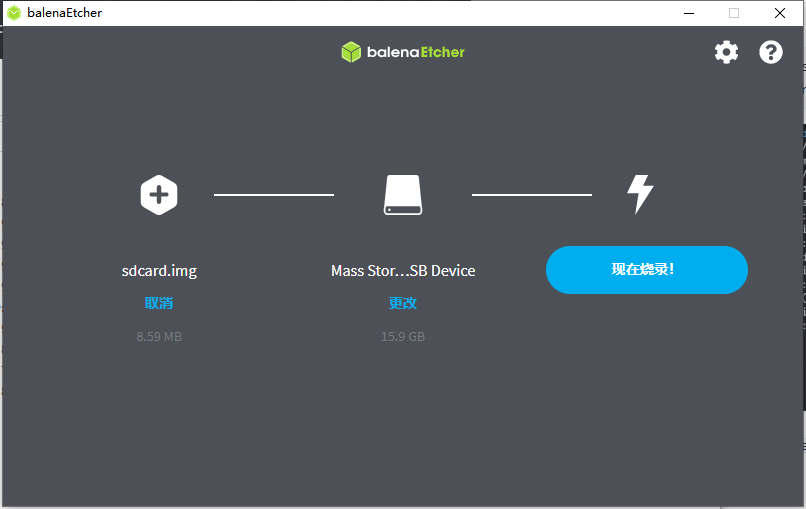
打包完成,可以找到img文件,使用軟件燒錄固件到TF卡上。
本文內容均轉載自https://www.gloomyghost.com/live/20231220.aspx
審核編輯:劉清
-
Linux系統
+關注
關注
4文章
595瀏覽量
27469 -
調試器
+關注
關注
1文章
306瀏覽量
23801 -
TF卡
+關注
關注
2文章
81瀏覽量
12199 -
Type-C接口
+關注
關注
1文章
146瀏覽量
20820
原文標題:使用TinyVision手動構建Linux 6.1 + Debian 12鏡像
文章出處:【微信號:gh_79acfa3aa3e3,微信公眾號:全志在線】歡迎添加關注!文章轉載請注明出處。
發布評論請先 登錄
相關推薦
在基于全志V851se的TinyVision上手動構建 Linux 6.1 + Debian 12 鏡像
在全志V851SE開發板TinyVision上 使用 SyterKit 啟動 Linux 6.7 主線內核
【NanoPi2試用體驗】燒寫Debian鏡像手機電腦VNC登錄(六)
如何為 risc-v64 芯片制作 Debian 鏡像
昉·星光 2(VisionFive 2)Debian 202308最新鏡像發布!
debian安裝教程
Armbian 23.02 \Linux 6.1 發布
linux鏡像制作工具
基于Debian的Sparky Linux 7.2的亮點


 如何使用TinyVision去手動構建Linux 6.1+Debian 12鏡像呢?




評論