環 境
Centos8
安裝podman
Podman 是一個容器環境,首先在主機上安裝 Podman。執行下面命令來安裝podman:
[root@localhost~]#yum-yinstallpodman然后修改一下用戶命名空間的大小:
[root@localhost~]#echo"user.max_user_namespaces=28633">>/etc/sysctl.d/userns.conf
[root@localhost~]#sysctl-p/etc/sysctl.d/userns.conf
user.max_user_namespaces=28633
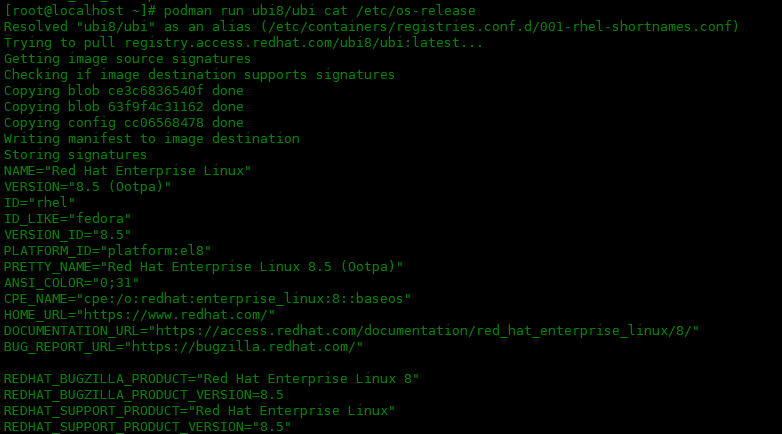
下面創建一個podman容器來看一下吧,下面使用的是RHEL的UBI鏡像:
[root@localhost~]#podmanrunubi8/ubicat/etc/os-release
Resolved"ubi8/ubi"asanalias(/etc/containers/registries.conf.d/001-rhel-shortnames.conf)
Tryingtopullregistry.access.redhat.com/ubi8/ubi:latest...
Gettingimagesourcesignatures
Checkingifimagedestinationsupportssignatures
Copyingblobce3c6836540fdone
Copyingblob63f9f4c31162done
Copyingconfigcc06568478done
Writingmanifesttoimagedestination
Storingsignatures
NAME="RedHatEnterpriseLinux"
VERSION="8.5(Ootpa)"
ID="rhel"
ID_LIKE="fedora"
VERSION_ID="8.5"
PLATFORM_ID="platform:el8"
PRETTY_NAME="RedHatEnterpriseLinux8.5(Ootpa)"
ANSI_COLOR="0;31"
CPE_NAME="cpe:/oenterprise_linux:baseos"
HOME_URL="https://www.redhat.com/"
DOCUMENTATION_URL="https://access.redhat.com/documentation/red_hat_enterprise_linux/8/"
BUG_REPORT_URL="https://bugzilla.redhat.com/"

REDHAT_BUGZILLA_PRODUCT="RedHatEnterpriseLinux8"
REDHAT_BUGZILLA_PRODUCT_VERSION=8.5
REDHAT_SUPPORT_PRODUCT="RedHatEnterpriseLinux"
REDHAT_SUPPORT_PRODUCT_VERSION="8.5"

創建Dockerfile
現在可以創建一個 Dockerfile 來指定如何構建新的鏡像。首先需要為 Dockerfile 文件創建一個目錄:
[root@localhost~]#mkdir~/myc
[root@localhost~]#cd~/myc
創建一個文件Dockerfile文件,來建立一個新鏡像:
[root@localhostmyc]#vimDockerfile

FROMubi8/ubi:latest
RUNdnfinstall-ynano

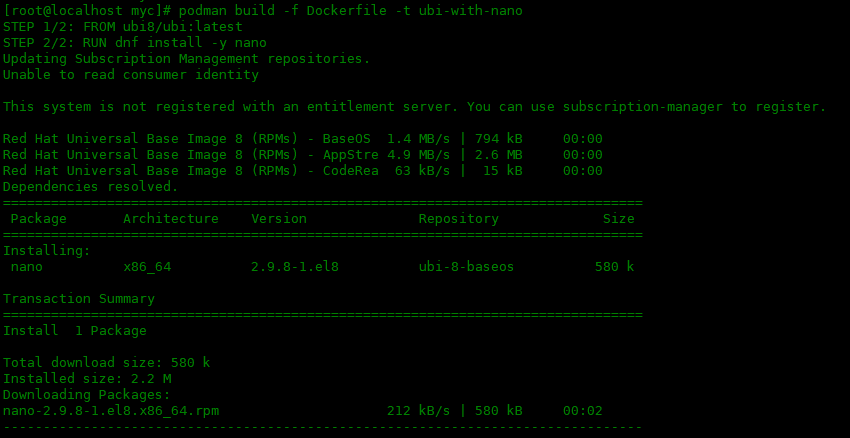
開始使用podman build來創建容器:
[root@localhostmyc]#podmanbuild-fDockerfile-tubi-with-nano
[root@localhostmyc]#podmanbuild-fDockerfile-tubi-with-nano
STEP1/2:FROMubi8/ubi:latest
STEP2/2:RUNdnfinstall-ynano
UpdatingSubscriptionManagementrepositories.
Unabletoreadconsumeridentity
...

使用podman images來確認是否創建新鏡像:
[root@localhostmyc]#podmanimages

現在你可以運行容器了,檢查nano編輯器是否可用:
[root@localhostmyc]#podmanrunlocalhost/ubi-with-nano/usr/bin/whichnano
/usr/bin/nano
通過查看nano執行文件的位置,來檢查是否安裝。 Nano 現在已安裝在你的自定義容器中。還可以交互式的運行容器:
[root@localhostmyc]#podmanrun-itlocalhost/ubi-with-nano/bin/bash
[root@d1f0e46f2b6d/]#ls
bindevhomelib64mediaoptrootsbinsysusr
bootetcliblost+foundmntprocrunsrvtmpvar
[root@d1f0e46f2b6d/]#

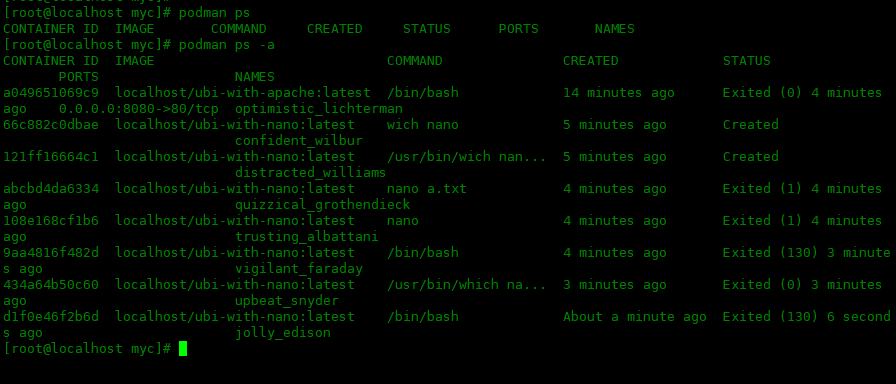
在容器中運行exit來退出容器。 可以使用podman ps來查看運行的容器,如果需要查看以停止的容器,可以添加-a選項:
[root@localhostmyc]#podmanps
[root@localhostmyc]#podmanps-a

存 儲
經常讓新用戶感到困惑的一件事是它們的短暫性。例如進入容器里創建的文件,退出之后,再次進入發現文件沒有了。下面我們將容器中需要存儲永久性文件的文件夾掛載到系統的某個文件夾中。下面在本機創建一個存儲位置:
[root@localhost~]#mkdir/pod_data然后使用您的存儲目錄作為一些相關的掛載點來啟動容器。此示例將本地目錄/pod_data綁定到容器中名為/storage的位置,必須在目錄位置附加:Z,以便 SELinux 可以在主機和 Podman 之間轉換上下文。
[root@localhost~]#podmanrun-it--volume/pod_data:/storage:Zlocalhost/ubi-with-nano
[root@d590bc344b76/]#echo"hellopodman">>/storage/msg.txt
[root@d590bc344b76/]#exit
exit
[root@localhost~]#cat/pod_data/msg.txt
hellopodman

可以看到目錄綁定之后,在容器中寫入數據,退出容器,在本機的/pod_data可以看到寫入的內容。
審核編輯:劉清
-
LINUX內核
+關注
關注
1文章
316瀏覽量
21704 -
UBI
+關注
關注
0文章
9瀏覽量
4128 -
RHEL
+關注
關注
0文章
15瀏覽量
3023
原文標題:如何快速建立一個 podman 環境
文章出處:【微信號:良許Linux,微信公眾號:良許Linux】歡迎添加關注!文章轉載請注明出處。
發布評論請先 登錄
相關推薦
如何在Docker中創建容器
理解Docker容器并暢玩docker
什么時候獲取嵌入式的Servlet容器并啟動Tomcat
從頭創建Jetson的容器
在Rocky8安裝并使用podman
使用podman-compose部署wordpress的示例
除了Docker我們還有哪些選擇?
組織容器網絡的原理及方案
Docker 教程:如何將Helix QAC作為容器創建并運行

Podman中運用容器存儲庫實用教程
Dockerfile鏡像制作與Docker-Compose容器編排


 如何安裝podman并創建podman容器


評論