今天有點空,我們移植一下LVGL~
先看效果圖:
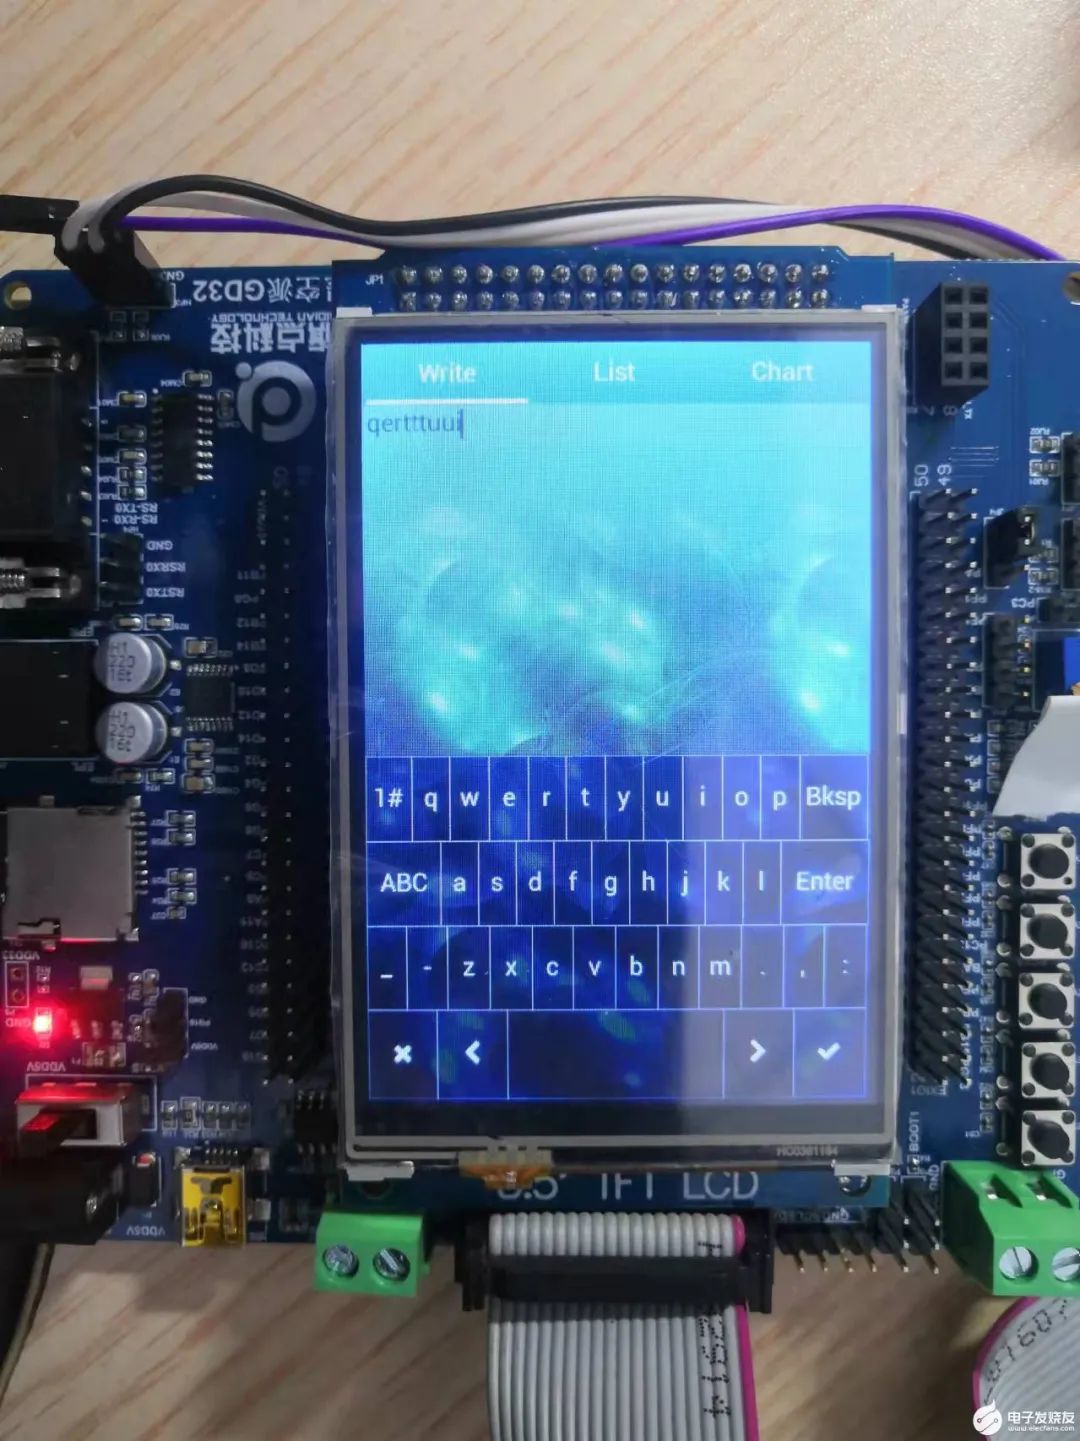
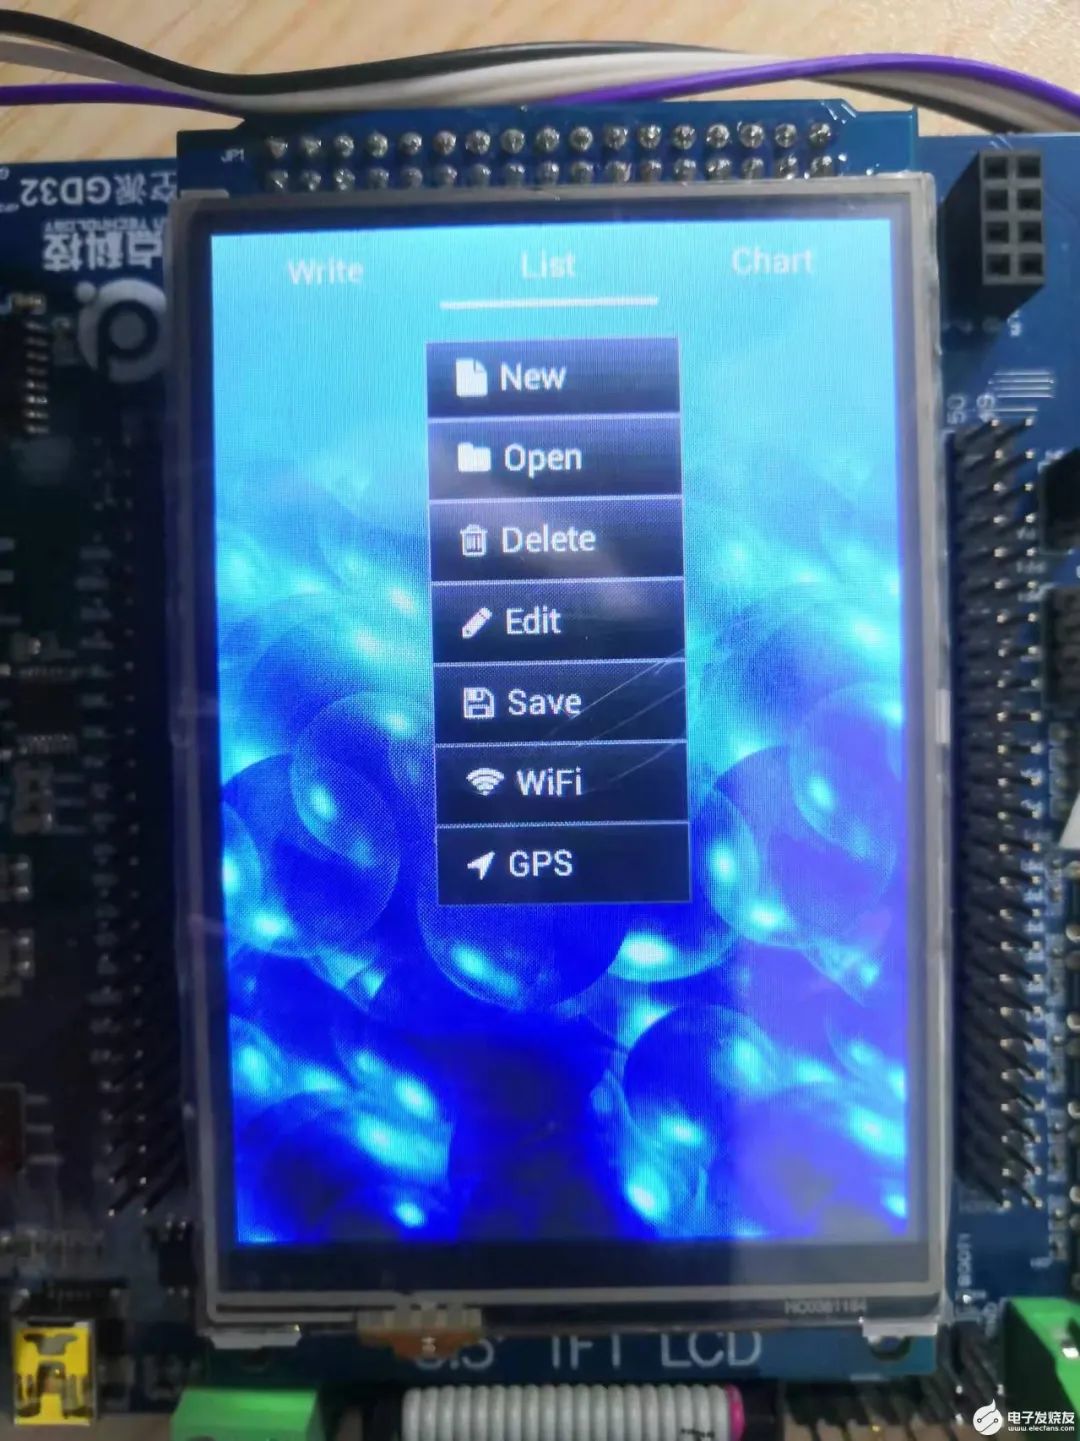
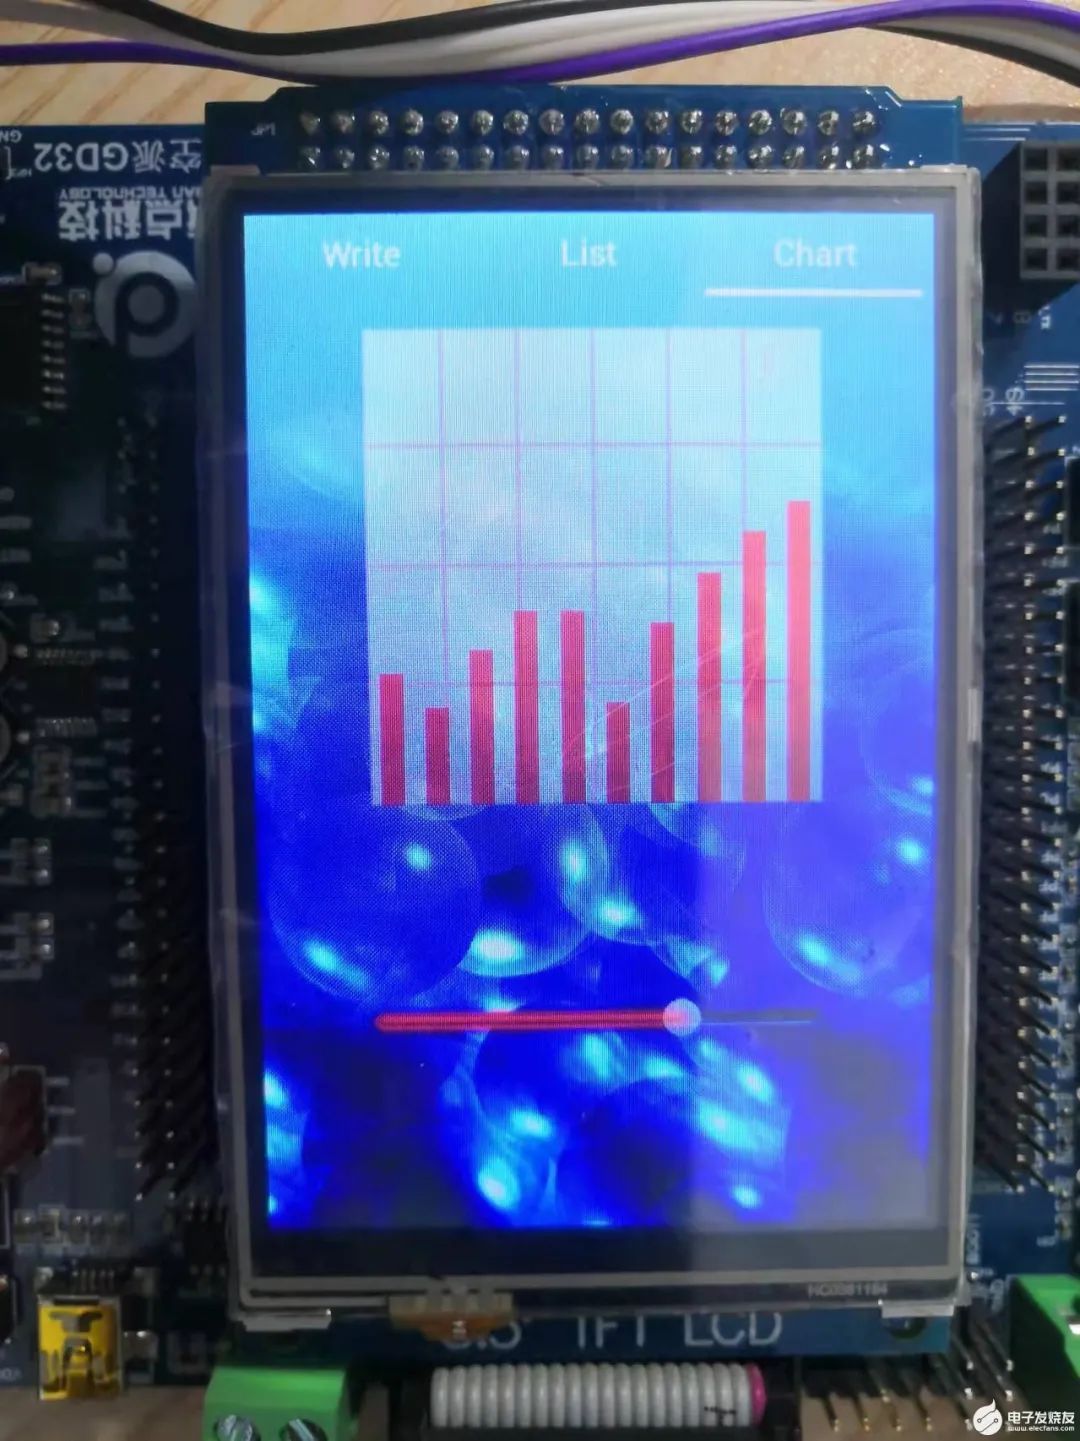
在這之前,我們得調試好屏幕及觸摸~
我們以之前的LCD那個程序為模板,開始添加LVGL文件。
先下載LVGL源文件包(點擊“閱讀原文”查看原貼即可下載)解壓下來,將GUI添加進工程:
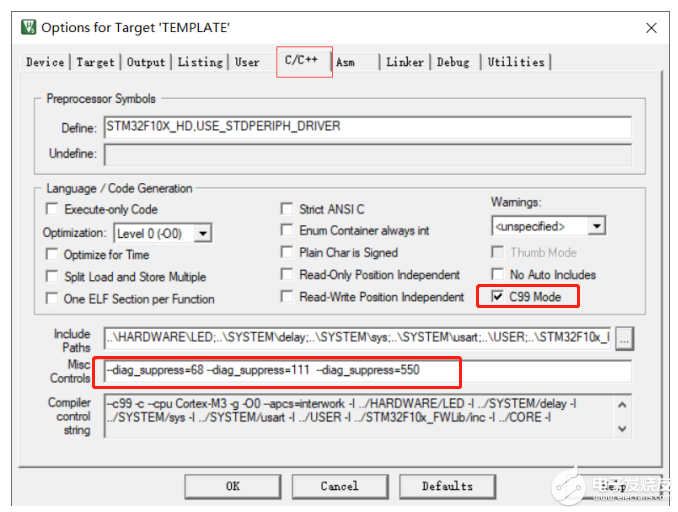
其中由于LVGL的特性,需要添加C99支持,并屏蔽一些類型的警告:
勾選C99,并在Misc Controls 中填入 --diag_suppress=68 --diag_supp
ress=111 --diag_suppress=550:
添加LVGL的心跳,這了由于已經用了SYStiCK作為延時定時器。
我們這了新開一個定時器1,并設定為1ms中斷,為LVGL提供心跳節拍~
//1秒產生一次中斷 int_time = CLK / ((prescaler+1) * (period+1))void TIM1_Int_Init(u16 arr,u16 psc){timer_parameter_struct timer_parameter;rcu_periph_clock_enable(RCU_TIMER1);//預分頻timer_parameter.prescaler = psc,//對齊模式timer_parameter.alignedmode = TIMER_COUNTER_EDGE,//定時器增長方向timer_parameter.counterdirection = TIMER_COUNTER_UP,//定時器自動加載值timer_parameter.period = arr,//時鐘分頻值timer_parameter.clockdivision = TIMER_CKDIV_DIV4,timer_init(TIMER1, &timer_parameter);timer_interrupt_enable(TIMER1, TIMER_INT_UP);nvic_irq_enable(TIMER1_IRQn, 0, 2);timer_enable(TIMER1);}void TIMER1_IRQHandler(){IF (timer_interrupt_flag_get(TIMER1, TIMER_INT_UP) != RESET){lv_tick_inc(1);//lvgl的1ms心跳timer_interrupt_flag_clear(TIMER1, TIMER_INT_UP);}}
在main初始化里面設定:
TIM1_Int_Init(999,119);//定時器初始化(1ms 中斷),用于給 lvgl 提供 1ms 的心跳節拍
其余就是一些常見的config的配置:
對lv_conf.h進行如下修改:
/*** [url=home.php?mod=space&uid=1455510]@file[/url] lv_conf.h**//** COPY THIS FILE AS `lv_conf.h` NEXT TO the `lvgl` FOLDER*//* clang-format off *//*====================Graphical settings*====================*//* Maximal horizontal and vertical resolution to support by the library.*//* Color depth:* - 1: 1 byte per pixel* - 8: RGB233* - 16: RGB565* - 32: ARGB8888*//* Swap the 2 bytes of RGB565 color.* Useful if the display has a 8 bit inteRFace (e.g. SPI)*//* 1: Enable screen transparency.* Useful for OSD or other overlapping GUIs.* Requires `LV_COLOR_DEPTH = 32` colors and the screen's style should be modified: `style.body.opa = ...`*//*Images pixels with this color will not be drawn (with chroma keying)*//* Enable anti-aliasing (lines, and radiuses will be smoothed) *//* Default display refresh period.* Can be changed in the display driver (`lv_disp_drv_t`).*//* Dot Per Inch: used to initialize default sizes.* E.g. a button with width = LV_DPI / 2 -> half inch wide* (Not so important, you can adjust it to modify default sizes and spaces)*//* Type of coordinates. Should be `int16_t` (or `int32_t` for extreme cases) */typedef int16_t lv_coord_t;/*=========================Memory manager settings*=========================*//* LittelvGL's internal memory manager's settings.* The graphical objects and other related data are stored here. *//* 1: use custom malloc/free, 0: use the built-in `lv_mem_alloc` and `lv_mem_free` *//* Size of the memory used by `lv_mem_alloc` in bytes (>= 2kB)*//* Complier prefix for a big array declaration *//* Set an address for the memory pool instead of allocating it as an array.* Can be in external SRAM too. *//* Automatically defrag. on free. Defrag. means joining the adjacent free cells. *//* Garbage Collector settings* Used if lvgl is binded to higher level language and the memory is managed by that language *//*=======================Input device settings*=======================*//* Input device default settings.* Can be changed in the Input device driver (`lv_indev_drv_t`)*//* Input device read period in milliseconds *//* Drag threshold in pixels *//* Drag throw slow-down in [%]. Greater value -> faster slow-down *//* Long press time in milliseconds.* Time to send `LV_EVENT_LONG_PRESSSED`) *//* repeated trigger period in long press [ms]* Time between `LV_EVENT_LONG_PRESSED_REPEAT *//*==================* Feature usage*==================*//*1: Enable the Animations *//*Declare the type of the user data of animations (can be e.g. `void *`, `int`, `struct`)*/typedef void * lv_anim_user_data_t;/* 1: Enable shadow drawing*//* 1: Enable object groups (for keyboard/encoder navigation) */typedef void * lv_group_user_data_t;/* 1: Enable GPU interface*//* 1: Enable file system (might be required for images *//*Declare the type of the user data of file system drivers (can be e.g. `void *`, `int`, `struct`)*/typedef void * lv_fs_drv_user_data_t;/*1: Add a `user_data` to drivers and objects*//*========================* Image decoder and cache*========================*//* 1: Enable indexed (palette) images *//* 1: Enable alpha indexed images *//* Default image cache size. Image caching keeps the images opened.* If only the built-in image formats are used there is no real advantage of caching.* (I.e. no new image decoder is added)* With complex image decoders (e.g. PNG or JPG) caching can save the continuous open/decode of images.* However the opened images might consume additional RAM.* LV_IMG_CACHE_DEF_SIZE must be >= 1 *//*Declare the type of the user data of image decoder (can be e.g. `void *`, `int`, `struct`)*/typedef void * lv_img_decoder_user_data_t;/*=====================* Compiler settings*====================*//* Define a custom attribute to `lv_tick_inc` function *//* Define a custom attribute to `lv_task_handler` function *//* With size optimization (-Os) the compiler might not align data to* 4 or 8 byte boundary. This alignment will be explicitly applied where needed.* E.g. __attribute__((aligned(4))) *//* Attribute to mark large constant arrays for example* font's bitmaps *//*===================* HAL settings*==================*//* 1: use a custom tick source.* It removes the need to manually update the tick with `lv_tick_inc`) */typedef void * lv_disp_drv_user_data_t; /*Type of user data in the display driver*/typedef void * lv_indev_drv_user_data_t; /*Type of user data in the input device driver*//*================* Log settings*===============*//*1: Enable the log module*//* How important log should be added:* LV_LOG_LEVEL_TRACE A lot of logs to give detaiLED information* LV_LOG_LEVEL_INFO Log important events* LV_LOG_LEVEL_WARN Log if something unwanted happened but didn't cause a problem* LV_LOG_LEVEL_ERROR Only critical issue, when the system may fail* LV_LOG_LEVEL_NONE Do not log anything*//* 1: Print the log with 'printf';* 0: user need to register a callback with `lv_log_register_print`*//*================* THEME USAGE*================*//*==================* FONT USAGE*===================*//* The built-in fonts contains the ASCII range and some Symbols with 4 bit-per-pixel.* The symbols are available via `LV_SYMBOL_...` defines* More info about fonts: https://docs.littlevgl.com/#Fonts* To create a new font go to: https://littlevgl.com/ttf-font-to-c-array*//* Robot fonts with bpp = 4* https://fonts.google.com/specimen/Roboto *//*Pixel perfect monospace font* http://pelulamu.net/unscii/ *//* Optionally declare your custom fonts here.* You can use these fonts as default font too* and they will be available globally. E.g.* #define LV_FONT_CUSTOM_DECLARE LV_FONT_DECLARE(my_font_1)* LV_FONT_DECLARE(my_font_2)*//*Always set a default font from the built-in fonts*//* Enable it if you have fonts with a lot of characters.* The limit depends on the font size, font face and bpp* but with > 10,000 characters if you see issues probably you need to enable it.*//*Declare the type of the user data of fonts (can be e.g. `void *`, `int`, `struct`)*/typedef void * lv_font_user_data_t;/*=================* Text settings*=================*//* Select a character encoding for strings.* Your IDE or editor should have the same character encoding* - LV_TXT_ENC_UTF8* - LV_TXT_ENC_ASCII* *//*Can break (wrap) texts on these chars*//*===================* LV_OBJ SETTINGS*==================*//*Declare the type of the user data of object (can be e.g. `void *`, `int`, `struct`)*/typedef void * lv_obj_user_data_t;/*1: enable `lv_obj_realaign()` based on `lv_obj_align()` parameters*//* Enable to make the object clickable on a larger area.* LV_EXT_CLICK_AREA_OFF or 0: Disable this feature* LV_EXT_CLICK_AREA_TINY: The extra area can be adjusted horizontally and vertically (0..255 px)* LV_EXT_CLICK_AREA_FULL: The extra area can be adjusted in all 4 directions (-32k..+32k px)*//*==================* LV OBJ X USAGE*================*//** Documentation of the object types: https://docs.littlevgl.com/#Object-types*//*Arc (dependencies: -)*//*Bar (dependencies: -)*//*Button (dependencies: lv_cont*//*Enable button-state animations - draw a circle on click (dependencies: LV_USE_ANIMATION)*//*Button matrix (dependencies: -)*//*Calendar (dependencies: -)*//*Canvas (dependencies: lv_img)*//*Check box (dependencies: lv_btn, lv_label)*//*Chart (dependencies: -)*//*Container (dependencies: -*//*Drop down list (dependencies: lv_page, lv_label, lv_symbol_def.h)*//*Open and close default animation time [ms] (0: no animation)*//*Gauge (dependencies:lv_bar, lv_lmeter)*//*Image (dependencies: lv_label*//*Image Button (dependencies: lv_btn*//*1: The imgbtn requires left, mid and right parts and the width can be set freely*//*Keyboard (dependencies: lv_btnm)*//*Label (dependencies: -*//*Hor, or ver. scroll speed [px/sec] in 'LV_LABEL_LONG_ROLL/ROLL_CIRC' mode*//* Waiting period at beginning/end of animation cycle *//*Enable selecting text of the label *//*Store extra some info in labels (12 bytes) to speed up drawing of very long texts*//*LED (dependencies: -)*//*Line (dependencies: -*//*List (dependencies: lv_page, lv_btn, lv_label, (lv_img optionally for icons ))*//*Default animation time of focusing to a list element [ms] (0: no animation) *//*Line meter (dependencies: *;)*//*Message box (dependencies: lv_rect, lv_btnm, lv_label)*//*Page (dependencies: lv_cont)*//*Focus default animation time [ms] (0: no animation)*//*Preload (dependencies: lv_arc, lv_anim)*//*Roller (dependencies: lv_ddlist)*//*Focus animation time [ms] (0: no animation)*//*Number of extra "pages" when the roller is infinite*//*Slider (dependencies: lv_bar)*//*Spinbox (dependencies: lv_ta)*//*Switch (dependencies: lv_slider)*//*Text area (dependencies: lv_label, lv_page)*//*Table (dependencies: lv_label)*//*Tab (dependencies: lv_page, lv_btnm)*//*Time of slide animation [ms] (0: no animation)*//*Tileview (dependencies: lv_page) *//*Time of slide animation [ms] (0: no animation)*//*Window (dependencies: lv_cont, lv_btn, lv_label, lv_img, lv_page)*//*==================* Non-user section*==================*//*--END OF LV_CONF_H--*//*Be sure every define has a default value*/
主要分辨率要選成自己的屏幕對于的,并關閉系統支持~
下面我們對底層進行移植:
主要是lcd驅動及TOUCH驅動,我們把LVGL里面porting文件夾里面的temp進行修改:
其中:
lv_port_dis.c
/*** @file lv_port_disp.c**//*Copy this file as "lv_port_disp.c" and set this value to "1" to enable content*//********************** INCLUDES*********************//********************** DEFINES*********************//*********************** TYPEDEFS**********************//*********************** STATIC PROTOTYPES**********************/static void disp_init(void);static void disp_flush(lv_disp_drv_t * disp_drv, const lv_area_t * area, lv_color_t * color_p);static void gpu_blend(lv_color_t * dest, const lv_color_t * src, uint32_t length, lv_opa_t opa);static void gpu_fill(lv_color_t * dest, uint32_t length, lv_color_t color);/*********************** STATIC VARIABLES**********************//*********************** MACROS**********************//*********************** GLOBAL FUNCTIONS**********************/void lv_port_disp_init(void){/*-------------------------* Initialize your display* -----------------------*/disp_init();/*-----------------------------* Create a buffer for drawing*----------------------------*//* Example for 1) */static lv_disp_buf_t disp_buf_1;static lv_color_t buf1_1[LV_HOR_RES_MAX * 10]; /*A buffer for 10 rows*/lv_disp_buf_init(&disp_buf_1, buf1_1, NULL, LV_HOR_RES_MAX * 10); /*Initialize the display buffer*//*-----------------------------------* Register the display in LittlevGL*----------------------------------*/lv_disp_drv_t disp_drv; /*Descriptor of a display driver*/lv_disp_drv_init(&disp_drv); /*Basic initialization*//*Set up the functions to access to your display*//*Set the resolution of the display*///適配多個屏幕disp_drv.hor_res = lcddev.width;disp_drv.ver_res = lcddev.height;/*Used to copy the buffer's content to the display*/disp_drv.flush_cb = disp_flush;/*Set a display buffer*/disp_drv.buffer = &disp_buf_1;/*Optionally add functions to access the GPU. (Only in buffered mode, LV_VDB_SIZE != 0)*//*Blend two color array using opacity*/disp_drv.gpu_blend = gpu_blend;/*Fill a memory array with a color*/disp_drv.gpu_fill = gpu_fill;/*Finally register the driver*/lv_disp_drv_register(&disp_drv);}/*********************** STATIC FUNCTIONS**********************//* Initialize your display and the required peripherals. */static void disp_init(void){/*You code here*/}/* Flush the content of the internal buffer the specific area on the display* You can use DMA or any hardware acceleration to do this operation in the background but* 'lv_disp_flush_ready()' has to be called when finished. */static void disp_flush(lv_disp_drv_t * disp_drv, const lv_area_t * area, lv_color_t * color_p){LCD_Color_Fill(area->x1,area->y1,area->x2,area->y2,(u16*)color_p);/* IMPORTANT!!!* Inform the graphics library that you are ready with the flushing*/lv_disp_flush_ready(disp_drv);}/*OPTIONAL: GPU INTERFACE*//* If your MCU has hardware accelerator (GPU) then you can use it to blend to memories using opacity* It can be used only in buffered mode (LV_VDB_SIZE != 0 in lv_conf.h)*/static void gpu_blend(lv_disp_drv_t * disp_drv, lv_color_t * dest, const lv_color_t * src, uint32_t length, lv_opa_t opa){/*It's an example code which should be done by your GPU*/uint32_t i;for(i = 0; i < length; i++) {dest[i] = lv_color_mix(dest[i], src[i], opa);}}/* If your MCU has hardware accelerator (GPU) then you can use it to fill a memory with a color* It can be used only in buffered mode (LV_VDB_SIZE != 0 in lv_conf.h)*/static void gpu_fill_cb(lv_disp_drv_t * disp_drv, lv_color_t * dest_buf, lv_coord_t dest_width,const lv_area_t * fill_area, lv_color_t color);{/*It's an example code which should be done by your GPU*/uint32_t x, y;dest_buf += dest_width * fill_area->y1; /*Go to the first line*/for(y = fill_area->y1; y < fill_area->y2; y++) {for(x = fill_area->x1; x < fill_area->x2; x++) {dest_buf[x] = color;}dest_buf+=dest_width; /*Go to the next line*/}}/* This dummy typedef exists purely to silence -Wpedantic. */typedef int keep_pedantic_happy;
lv_port_indev.c
/*** @file lv_port_indev.c**//*Copy this file as "lv_port_indev.c" and set this value to "1" to enable content*//********************** INCLUDES*********************//********************** DEFINES*********************//*********************** TYPEDEFS**********************//*********************** STATIC PROTOTYPES**********************/static bool touchpad_read(lv_indev_drv_t * indev_drv, lv_indev_data_t * data);/*********************** STATIC VARIABLES**********************//*********************** MACROS**********************//*********************** GLOBAL FUNCTIONS**********************/void lv_port_indev_init(void){lv_indev_drv_t indev_drv;/*------------------* Touchpad* -----------------*//*Register a touchpad input device*/lv_indev_drv_init(&indev_drv);indev_drv.type = LV_INDEV_TYPE_POINTER;indev_drv.read_cb = touchpad_read;lv_indev_drv_register(&indev_drv);}/*********************** STATIC FUNCTIONS**********************//* Will be called by the library to read the touchpad */static bool touchpad_read(lv_indev_drv_t * indev_drv, lv_indev_data_t * data){static uint16_t last_x = 0;static uint16_t last_y = 0;if(tp_dev.sta&TP_PRES_DOWN)//觸摸按下了{last_x = tp_dev.x[0];last_y = tp_dev.y[0];data->point.x = last_x;data->point.y = last_y;data->state = LV_INDEV_STATE_PR;}else{data->point.x = last_x;data->point.y = last_y;data->state = LV_INDEV_STATE_REL;}/*Return `false` because we are not buffering and no more data to read*/return false;}/* This dummy typedef exists purely to silence -Wpedantic. */typedef int keep_pedantic_happy;
在新建一個GUI_APP文件夾,把里面我們要展示的例子,添加進去~
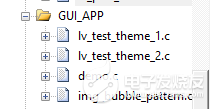
在main函數里面調用:
TIM1_Int_Init(999,119);//定時器初始化(1ms 中斷),用于給 lvgl 提供 1ms 的心跳節拍LCD_Init();tp_dev.init();//觸摸初始化lv_init(); //lvgl系統初始化lv_port_disp_init(); //lvgl顯示接口初始化,放在lv_init()的后面lv_port_indev_init(); //lvgl輸入接口初始化,放在lv_init()的后面//通過TEST_NUM的值來選擇運行不同的例程demo_create();lv_test_theme_1(lv_theme_night_init(210, NULL));lv_test_theme_2();while(1){tp_dev.scan(0);lv_task_handler();}
編譯,查看效果。如前圖。好了LVGL的移植就到這了。謝謝大家觀看~
-
移植
+關注
關注
1文章
382瀏覽量
28157 -
函數
+關注
關注
3文章
4344瀏覽量
62861 -
開發板
+關注
關注
25文章
5116瀏覽量
97932 -
LVGL
+關注
關注
1文章
90瀏覽量
3023
原文標題:【技術分享】星空派GD32開發板LVGL移植經驗分享
文章出處:【微信號:gh_9b9470648b3c,微信公眾號:電子發燒友論壇】歡迎添加關注!文章轉載請注明出處。
發布評論請先 登錄
相關推薦
【星空派GD32F303開發板試用體驗】開發記錄匯總
移植OpenHarmony 3.0到星空派開發板
移植RT-Thread操作系統到GD32星空派開發板
移植RT-Thread操作系統到GD32星空派開發板
【星空派GD32F303開發板試用體驗】-01-開啟封印釋放靈魂之板卡介紹和流水燈實驗
【星空派GD32F303開發板試用體驗】開箱點燈
【星空派GD32F303開發板試用體驗】開箱+環境搭建
【星空派GD32F303開發板試用體驗】開箱+環境搭建
【星空派GD32F303開發板試用體驗】+板卡概覽
關于GD32首塊Arm? mbed?開發板的分析和應用
如何移植OpenHarmony 3.0 到星空派開發板上


 【技術分享】星空派GD32開發板LVGL移植經驗分享


評論