第三步是硬件系統(tǒng)的構(gòu)建,原文采用的vivado,我采用的是EDK+SDK,所以這一節(jié)有點(diǎn)不一樣,但是過(guò)程是一樣的,生成文件也是一樣的,都是生成system.bit,fsbl,加上step2中生成的u-boot.elf,三個(gè)文件一起生成boot.bin文件。主要是看你習(xí)慣用vivado還是ISE,我偏向于ISE。如果大家想用vivado,那就就按照原文操作,我采用EDK+SDK單獨(dú)講解。
Now on to the base design. Open your chosen version of Vivado, I am working with Vivado 2014.4 and the corresponding SDK. Open the base design project under zybo_base_system/source/vivado/hw/zybo_bsd/zybo_bsd.xpr. If you are using the version that the base design was created with then this next part does not pertain to you and you can go ahead and generate the bitstream. If you are not using the version that it was created on then you will be prompted with an Older Project Version warning and an option to automatically upgrade to the current version. Select okay to automatically upgrade. A second warning will apear saying Vivado no longer uses ‘work’, select okay. The third warning is notify you that some Xilinx IP’s have undergone changes in this version of Vivado, select report ip status. Select the Upgrade Selected at the bottom of the design tool. It will ask if you wish to proceed, select ok.
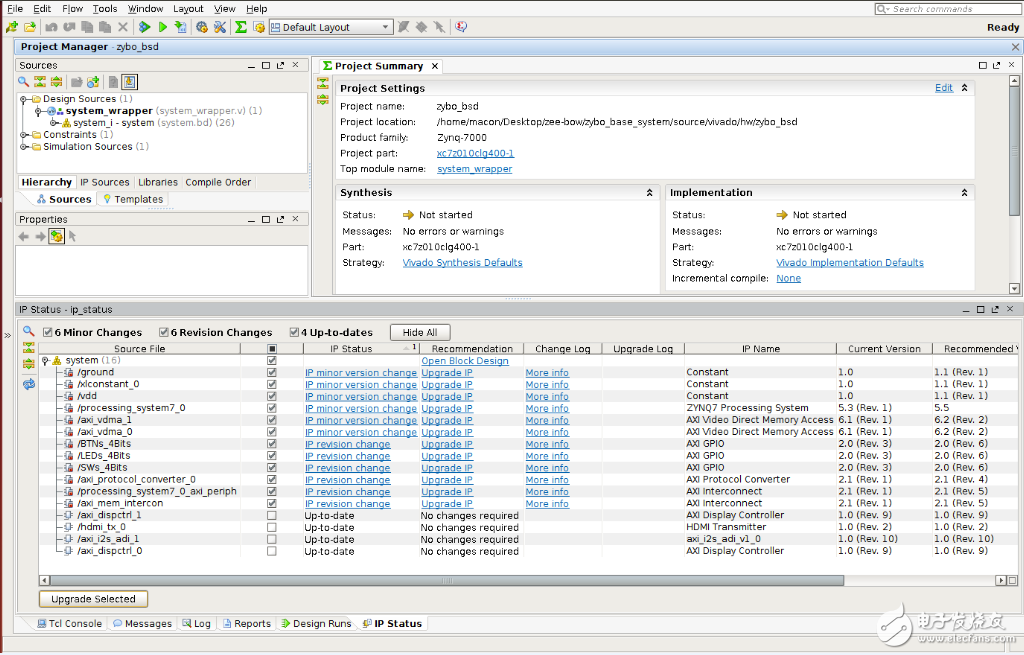
Figure 7: Upgrading IPs in Vivado 2014.4.
The tool will notify you that there were six critical warning messages, select ok. These will not cause an issue with the system. The next step is to generate the bitstream. There are no implementations available so the tool will ask to launch synthesis and implementation before generating the bitstream, select yes. There will be warnings that appear during the sysnthesis and implementation, select ok do not worry about those for now. I would recommend reading up on some of the references as this may take some time depending on the processing power of your computer. Once the tool has finished you will need to export hardware.
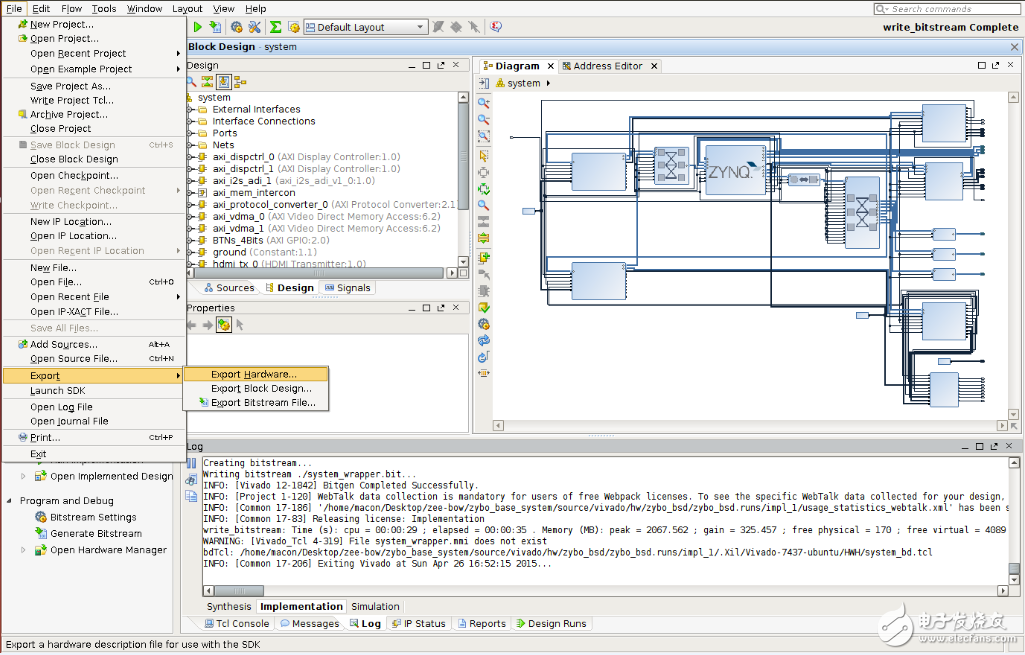
Figure 8: Exporting hardware for SDK.
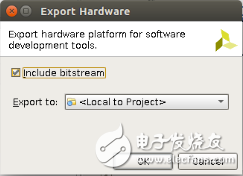
Include the bitstream when exporting the hardware and then launch the SDK
Figure 9: Include Bitstream when exporting hardware.
Step 3: Building the base design(EDK)
目的:生成system.bit,并到處硬件工程到SDK
下載得到zybo_base_system.zip
打開(kāi)zybo_base_systemzybo_base_systemsourceisehwsystem.xmp工程(EDK的工程文件),可以看到完整的zybo硬件構(gòu)架,然后點(diǎn)擊Export Design
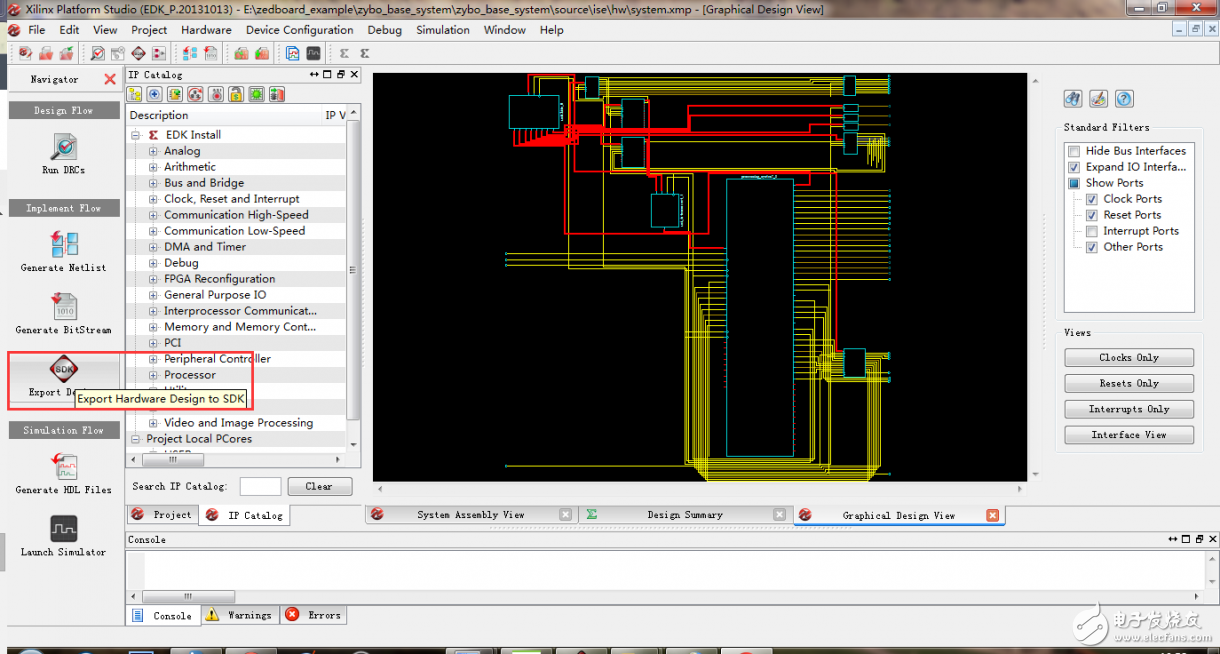
最后就會(huì)將生成的硬件文件導(dǎo)入到SDK中,新建一個(gè)application,Select C and standalone for the target software language and OS platform。
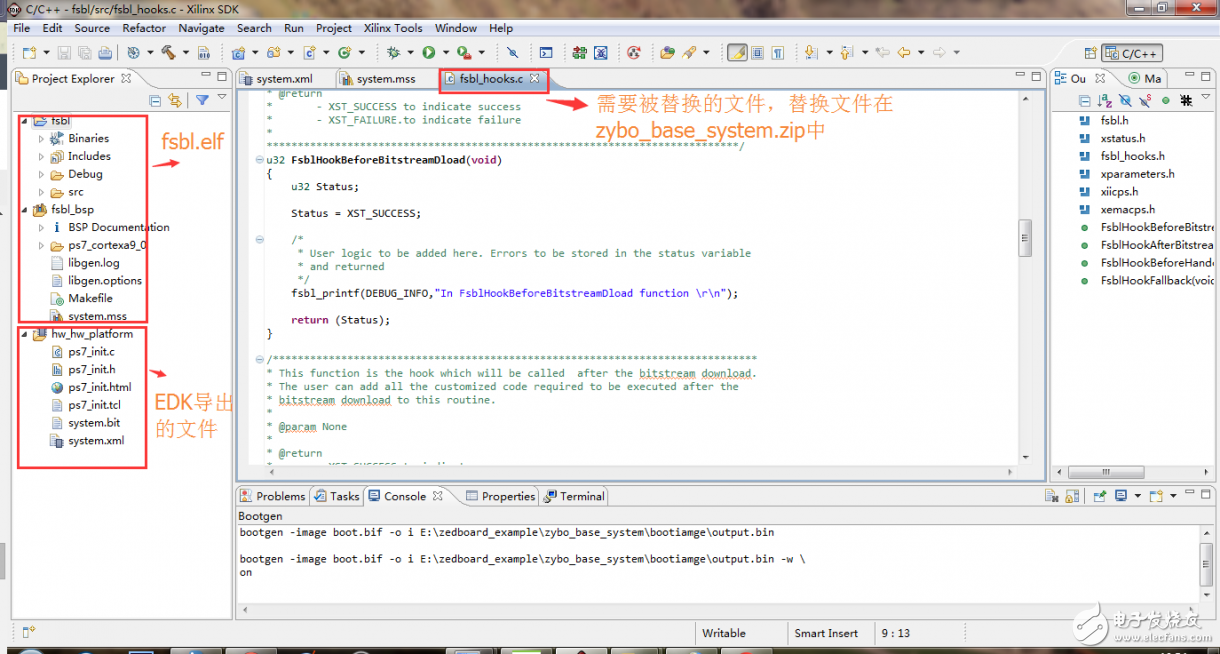
注意:一定要將fsbl中的fsbl_hooks.h文件替換,替換的fsbl_hooks.h文件在 zybo_base_system/source/vivado/SDK/fsbl 中
Step 4: First Stage Boot Loader
目的:創(chuàng)建fsbl應(yīng)用,生成fsbl.elf文件
Once the SDK loads create a new application project. Make sure the hardware platform has selected the hardware you previously exported from Vivado. Select C and standalone for the target software language and OS platform. Name the project fsbl and select next.
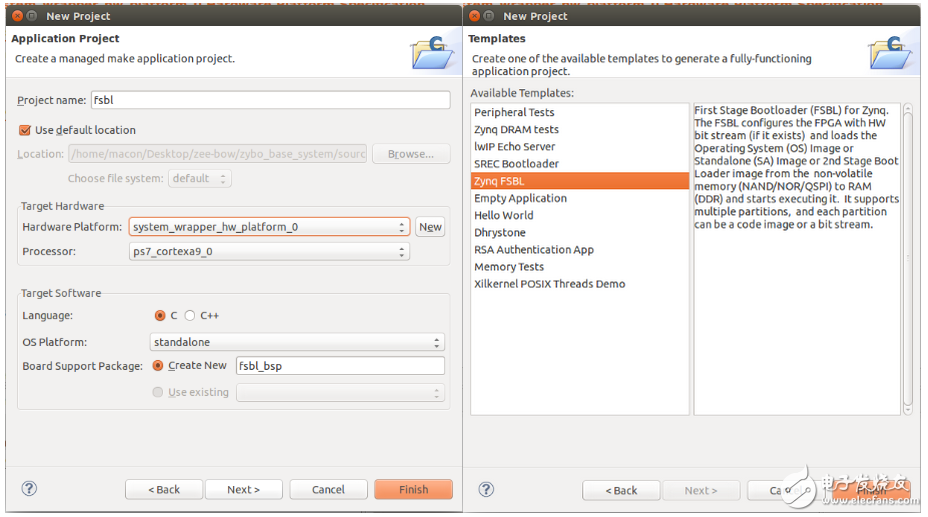
Figure 10: New application project specification
Now we will need to modify the fsbl_hooks.c file and set the mac address. Locate the ZYBO specific fsbl_hooks.c file in the zybo_base_system/source/vivado/SDK/fsbl folder and replace the one that was generated in the SDK fsbl project. Once you have replaced the fsbl_hooks clean and build the project. This will generate the fsbl.elf used to create the BOOT.bin in the next step.
Step 5: Building BOOT.bin
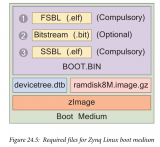
目的:由system.bit,fsbl.elf,u-boot.elf生成boot.bin文件
 電子發(fā)燒友App







評(píng)論