一、概述
Docker使用數據卷和數據卷容器來進行數據的持久化。
Pod是Kubernetes的基本單位,包含一個或多個容器。
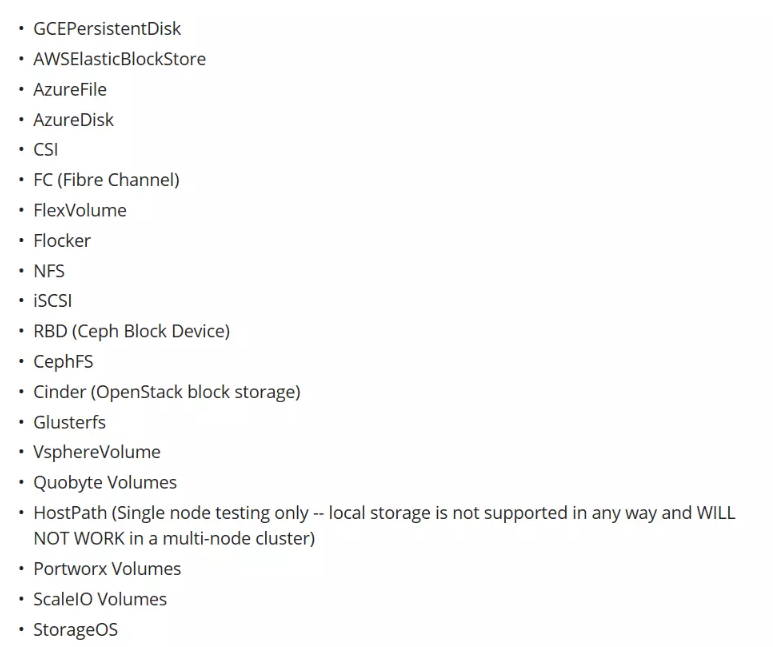
Pod內部的容器存在共享數據存儲的需求,Kubernetes給出了類似容器Volum(卷)的概念,與Pod具有相同的生命周期。
使用Volum,就需要知道存儲方案的技術細節,通常由運維人員來維護。而對開發人員來說,只想知道我需要多大的存儲空間、I/O是否能滿足要求等等這些細節。
為此,Kubernetes在Volum的基礎上做了進一步抽象,提出了PV(PersistentVolume,持久化卷)、PVC(PersistentVolumeClaim,持久化卷聲明)。
PV相當于一塊硬盤,由運維人員提供。
PVC是對存儲需求的聲明,由開發人員提供。
PVC可類比POD來理解,POD申請的是CPU和內存資源,而PVC則是申請存儲資源。
PV一般是預先手動創建的,開發人員每次都申請,則比較麻煩。是否可以根據PVC的要求,自動創建呢?
Kubernetes提出了 Sotrage Class ,實現PV的動態供給。
**二、實踐
**
(一)配置NFS服務器
NFS(Network File System)是一種分布式文件系統協議,可以通過網絡,讓不同的客戶端,可以彼此訪問共同的文件系統 ,來實現文件的共享。NFS服務器提供可以掛載的目錄,客戶端直接掛載在本地端的目錄。
- 安裝NFS服務器
apt-get install nfs-kernel-server
- 配置NFS服務器
/etc/exports為NFS服務器的配置文件。
root@linux:/tmp# vi /etc/exports
# /etc/exports: the access control list for filesystems which may be exported
#to NFS clients.  See exports(5).
# 訪問控制列表,以便NFS客戶端配置
# Example for NFSv2 and NFSv3:
# /srv/homes       hostname1(rw,sync,no_subtree_check) hostname2(ro,sync,no_subtree_check)
#
# Example for NFSv4:
# /srv/nfs4        gss/krb5i(rw,sync,fsid=0,crossmnt,no_subtree_check)
# /srv/nfs4/homes  gss/krb5i(rw,sync,no_subtree_check)
#
/tmp *(rw,no_root_squash,sync)
參數說明:
rw:設置目錄可讀寫;
no_root_squash:客戶端連接服務端時,如果是root用戶,那么,將擁有服務端目錄的root權限;
sync:將數據同步寫入內存緩沖區與磁盤中,效率低,但可以保證數據的一致性;
- NFS服務器的啟動
root@linux:/# service nfs-kernel-server start
- NFS客戶端配置
(1)安裝nfs-common
root@linux:/# apt install nfs-common
Reading package lists... Done
Building dependency tree
Reading state information... Done
The following package was automatically installed and is no longer required:
  grub-pc-bin
Use 'apt autoremove' to remove it.
The following additional packages will be installed:
  keyutils libnfsidmap2 libtirpc1 rpcbind
Suggested packages:
  watchdog
The following NEW packages will be installed:
  keyutils libnfsidmap2 libtirpc1 nfs-common rpcbind
0 upgraded, 5 newly installed, 0 to remove and 345 not upgraded.
Need to get 399 kB of archives.
...
(2)將本地/mnt/nfs目錄掛載在NFS服務器上/tmp
root@linux:/# mount -t nfs 30.0.1.90:/tmp /mnt/nfs
root@linux:/#
(5)新建測試文件:
root@linux:/# cd /mnt/nfs/
root@linux:/mnt/nfs# touch 1.txt
root@linux:/mnt/nfs# echo this is nfs test > 1.txt
root@linux:/mnt/nfs# ls
1.txt
(6)登錄NFS服務器,便可查到文件:
root@linux:/tmp# ll
total 72
-rw-r--r--  1 root    root       1.txt
root@linux:/tmp# cat 1.txt
this is nfs test
root@linux:/tmp#
(二)Kubernetes掛載NFS
編寫一個yaml文件,需要記住server地址和可供掛載的目錄
apiVersion: v1
kind: Pod
metadata:
  name: mountnfstest
  namespace: kubetest #
spec:
  containers:
  - name: nginx
    image: nginx:1.21.0
    ports:
    - containerPort: 80
    volumeMounts:
    - name: logs-volume
      mountPath: /var/log/nginx
  volumes:
  - name: logs-volume
    nfs:
      server: 30.0.1.90 # NFS服務器地址
      path: /tmp/ #可供掛載的目錄
-
容器
+關注
關注
0文章
496瀏覽量
22080 -
Docker
+關注
關注
0文章
478瀏覽量
11879
發布評論請先 登錄
相關推薦
Kubernetes存儲體系解析 淺談Volume概念的由來


從零開始入門 K8s | 應用存儲和持久化數據卷:核心知識
從零開始入門 K8s | 應用存儲和持久化數據卷:存儲快照與拓撲調度
從零開始入門 K8s | 應用存儲和持久化數據卷:核心知識
電纜材料PVC和PUR有什么區別
pvc軟板有什么特性_pvc老化時間是多久

光伏測試儀PV150/PV200/PV210數據導出手冊


 PV和PVC是什么


評論