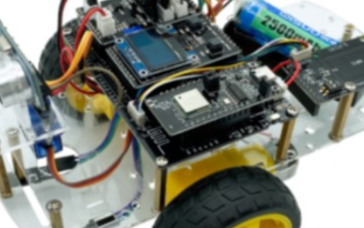
") Hi3861開發(fā)板與其它開發(fā)板的通信
Hi3861開發(fā)板與其它開發(fā)板的通信
張兵
就讀于貴州黔南科技學(xué)院
首期OpenHarmony開源開發(fā)者成長計(jì)劃“智能語音垃圾桶”項(xiàng)目開發(fā)者
一、搭建編譯環(huán)境
1、下載虛擬機(jī)VMware和Ubuntu20.0.14下載 VMware Workstation Pro | CN
https://www.vmware.com/cn/products/workstation-pro/workstation-pro-evaluation.html
Ubuntu系統(tǒng)下載 | Ubuntu
https://cn.ubuntu.com/download
2、 安裝vm完成后打開vm,點(diǎn)擊創(chuàng)建新的虛擬機(jī)
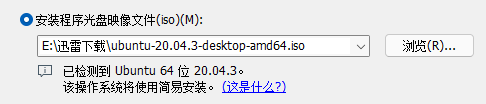
3、選擇典型點(diǎn)擊下一步,選擇下載的Ubuntu,點(diǎn)擊下一步,創(chuàng)建完成后虛擬機(jī)自動(dòng)安裝Ubuntu
4、安裝完成后獲取OpenHarmony源碼可參考
https://docs.openharmony.cn/pages/v3.1/zh-cn/device-dev/get-code/sourcecode-acquire.md/
5、安裝編譯工具
(1)安裝Node.js 打開Ubuntu終端輸入命令安裝:(2)安裝Python編譯環(huán)境sudo apt-get install nodejssudo apt-get install npmnode --version //查看nodejs版本npm--version//查看npm版本
(3) 安裝SConssudo apt-get install python3.8sudo apt-get install python3-pipsudo pip3 install setuptoolssudo pip3 install kconfiglibsudo pip3 install pycryptodomesudo pip3 install six --upgrade --ignore-installed sixsudopip3installecdsa
如圖:python3 -m pip install sconsscons-v//查看版本

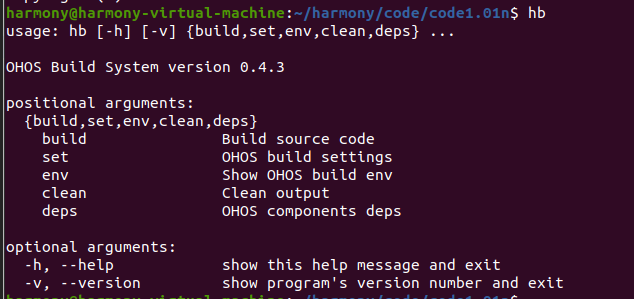
執(zhí)行"hb -h",有打印以下信息即表示安裝成功。python3 -m pip install --user ohos-buildvim ~/.bashrc //設(shè)置環(huán)境變量export PATH=~/.local/bin:$PATH //將以下命令拷貝到.bashrc文件的最后一行,保存并退出source~/.bashrc//更新環(huán)境變量
(5) 安裝gcc_riscv32
下載gcc_riscv32鏡像
https://gitee.com/link?target=https%3A%2F%2Frepo.huaweicloud.com%2Fharmonyos%2Fcompiler%2Fgcc_riscv32%2F7.3.0%2Flinux%2Fgcc_riscv32-linux-7.3.0.tar.gz
設(shè)置環(huán)境變量
將壓縮包解壓到根目錄
6、修改usr_config.mk文件 文件在OpenHarmony源碼目錄下 device/hisilicon/hispark_pegasus/sdk_liteos/build/config/usr_config.mktar -xvf gcc_riscv32-linux-7.3.0.tar.gz -C ~ //文件名需要與下載的文件相匹配設(shè)置環(huán)境變量。vim ~/.bashrc //設(shè)置環(huán)境變量export PATH=~/gcc_riscv32/bin:$PATH //將以下命令拷貝到.bashrc文件的最后一行,保存并退出source ~/.bashrc //更新環(huán)境變量riscv32-unknown-elf-gcc-v//顯示版本號(hào),則安裝成功
7、修改wifiservice文件夾 文件在OpenHarmony源碼目錄下 device/hisilicon/hispark_pegasus/hi3861_adapter/hals/communication/wifi_lite/wifiservice/source/wifi_hotspot.cCONFIG_I2C_SUPPORT=yCONFIG_PWM_SUPPORT=y
EnableHotspot函數(shù)中屏蔽如下字段//if (SetHotspotIpConfig() != WIFI_SUCCESS) {// return ERROR_WIFI_UNKNOWN;//}地址:device/hisilicon/hispark_pegasus/hi3861_adapter/hals/communication/wifi_lite/wifiservice/source/wifi_device.cDispatchConnectEvent函數(shù)下 屏蔽StaSetWifiNetConfig相關(guān)代碼行//StaSetWifiNetConfig(HI_WIFI_EVT_CONNECTED);//StaSetWifiNetConfig(HI_WIFI_EVT_DISCONNECTED);
二、創(chuàng)建項(xiàng)目文件夾
1、在OpenHarmony1.01版本創(chuàng)建一個(gè)項(xiàng)目demo在源碼目錄下的vendor/team_x創(chuàng)建smart_demo
在scr里面添加我們寫的代碼:

2、初始化uart串口
首先我們需要?jiǎng)?chuàng)建一個(gè)初始化uart串口的程序
將GPIO0初始化為tx端,將GPIO1初始化為rx端
3、創(chuàng)建線程任務(wù)void UartInit(void){RaiseLog(LOG_LEVEL_INFO,"[2022012x01] entry into UartInit");IoTGpioInit(HAL_WIFI_IOT_IO_NAME_GPIO_0);HalIoSetFunc(HAL_WIFI_IOT_IO_NAME_GPIO_0, WIFI_IOT_IO_FUNC_GPIO_0_UART1_TXD);IoTGpioInit(HAL_WIFI_IOT_IO_NAME_GPIO_1);HalIoSetFunc(HAL_WIFI_IOT_IO_NAME_GPIO_1, WIFI_IOT_IO_FUNC_GPIO_1_UART1_RXD);hi_uart_attribute uart_attr = {.baud_rate = UART_BAUD_RATE, /* baud_rate: 9600 */.data_bits = UART_DATA_BITS, /* data_bits: 8bits */.stop_bits = UART_STOP_BITS,.parity = 0,}RaiseLog(LOG_LEVEL_INFO,"[2022012x01] uart_init success");/* Initialize uart driver */hi_u32 ret = hi_uart_init(HI_UART_IDX_1, &uart_attr, HI_NULL);if (ret != HI_ERR_SUCCESS){printf("[Dustbin_tes3]Failed to init uart! Err code = %d ", ret);return;}}
4、接收串口數(shù)據(jù)static void *uart_demo_task(void){static uint16_t countSendTimes = 0;static uint8_t countReceiveTimes = 0;uartController.isReadBusy = false;printf("[Initialize uart successfully ");UartInit();while (1){osDelay(50);UartReceiveMessage();//Collecting Serial Port Datahi_sleep(SMART_BIN_SLEEP_2500MS);}return 0;}static void IotMainEntry(void){osThreadAttr_t attr;RaiseLog(LOG_LEVEL_INFO, "DATA:%s Time:%s ", __FUNCTION__, __DATE__, __TIME__);// Create the IoT Main taskattr.attr_bits = 0U;attr.cb_mem = NULL;attr.cb_size = 0U;attr.stack_mem = NULLattr.stack_size = CONFIG_TASK_MAIN_STACKSIZE;attr.priority = CONFIG_TASK_MAIN_PRIOR;attr.name = "IoTMain";(void) osThreadNew((osThreadFunc_t)uart_demo_task, NULL, (const osThreadAttr_t *)&attr);return;}APP_FEATURE_INIT(IotMainEntry);
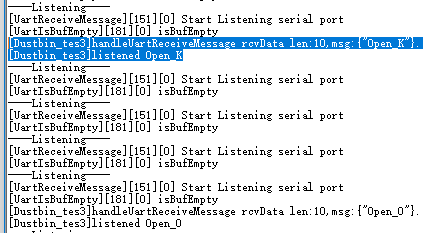
static void UartReceiveMessage(void){char *recData;printf("----Listening---- ");RaiseLog(LOG_LEVEL_INFO,"Start Listening serial port");if (UartIsBufEmpty()){return;}if (uartController.isReadBusy){return;}uartController.isReadBusy = true;g_ReceivedDatalen = hi_uart_read(UART_NUM, g_uart_buff, UART_BUFF_SIZE);if (g_ReceivedDatalen > 0){printf("handleUartReceiveMessage rcvData len:%d,msg:%s. ", g_ReceivedDatalen, g_uart_buff);setVoiceCommand();//Setting voice Commandsmemset(g_uart_buff, 0, sizeof(g_uart_buff));g_ReceivedDatalen = 0;}uartController.isReadBusy = false;}
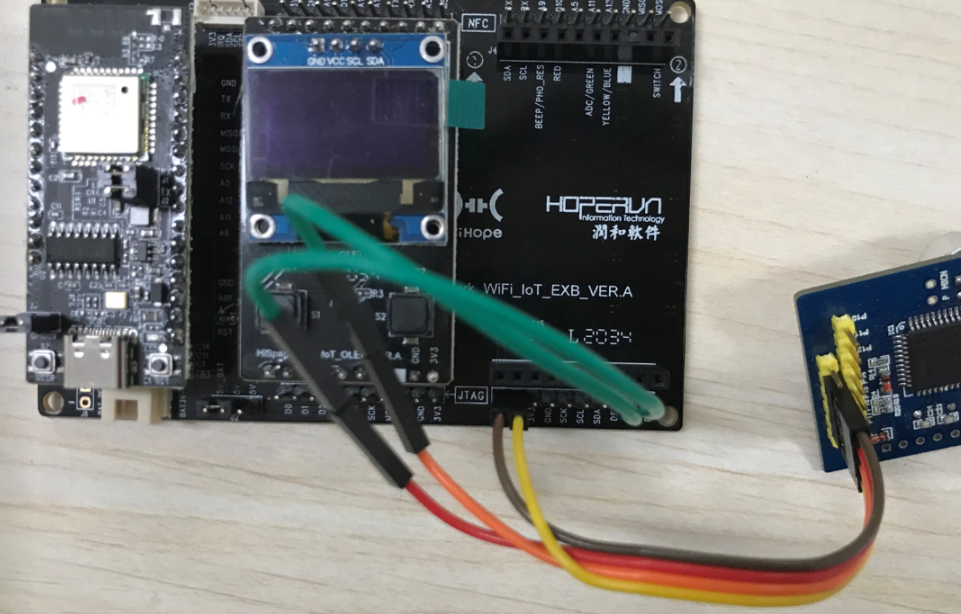
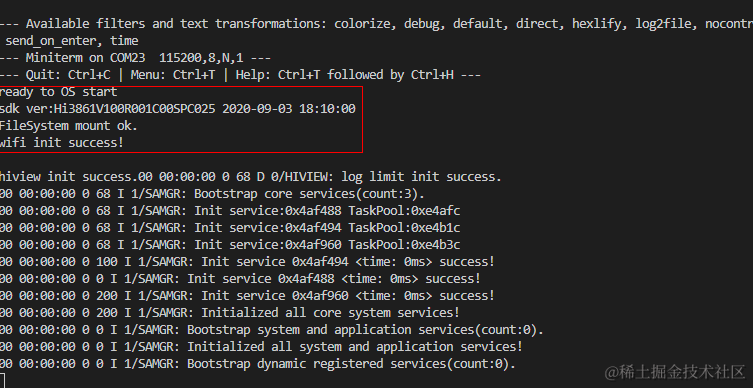
當(dāng)hi3861開發(fā)板接收到其他開發(fā)板傳輸?shù)臄?shù)據(jù)后,可以通過串口打印出來,對(duì)此可以寫一個(gè)解析命令,對(duì)發(fā)送的字符串,執(zhí)行相應(yīng)的命令
注:在接線時(shí),要將tx與另一個(gè)開發(fā)板的rx連接,因?yàn)樵赨ART串口協(xié)議中,通過TX(發(fā)送引腳)和RX(接收引腳)進(jìn)行數(shù)據(jù)傳輸與接收,需要將TX發(fā)送引腳與另一開發(fā)板的RX接收引腳相連接,故需要交叉連接以保證兩塊開發(fā)板的正常通信。
-
uart
+關(guān)注
關(guān)注
22文章
1245瀏覽量
102010 -
開發(fā)板
+關(guān)注
關(guān)注
25文章
5186瀏覽量
98716 -
VMware
+關(guān)注
關(guān)注
1文章
299瀏覽量
21900 -
Hi3861
+關(guān)注
關(guān)注
1文章
63瀏覽量
6673
原文標(biāo)題:Hi3861 通過UART串口協(xié)議與其它開發(fā)板進(jìn)行通信
文章出處:【微信號(hào):gh_e4f28cfa3159,微信公眾號(hào):OpenAtom OpenHarmony】歡迎添加關(guān)注!文章轉(zhuǎn)載請(qǐng)注明出處。
發(fā)布評(píng)論請(qǐng)先 登錄
相關(guān)推薦
鴻蒙OpenHarmony【輕量系統(tǒng)運(yùn)行】 (基于Hi3861開發(fā)板)
鴻蒙OpenHarmony【集成三方SDK】 (基于Hi3861開發(fā)板)
鴻蒙OpenHarmony【輕量系統(tǒng) 環(huán)境搭建】 (基于Hi3861開發(fā)板)

鴻蒙OpenHarmony【輕量系統(tǒng) 燒錄】 (基于Hi3861開發(fā)板)
鴻蒙OpenHarmony【輕量系統(tǒng) 運(yùn)行】 (基于Hi3861開發(fā)板)
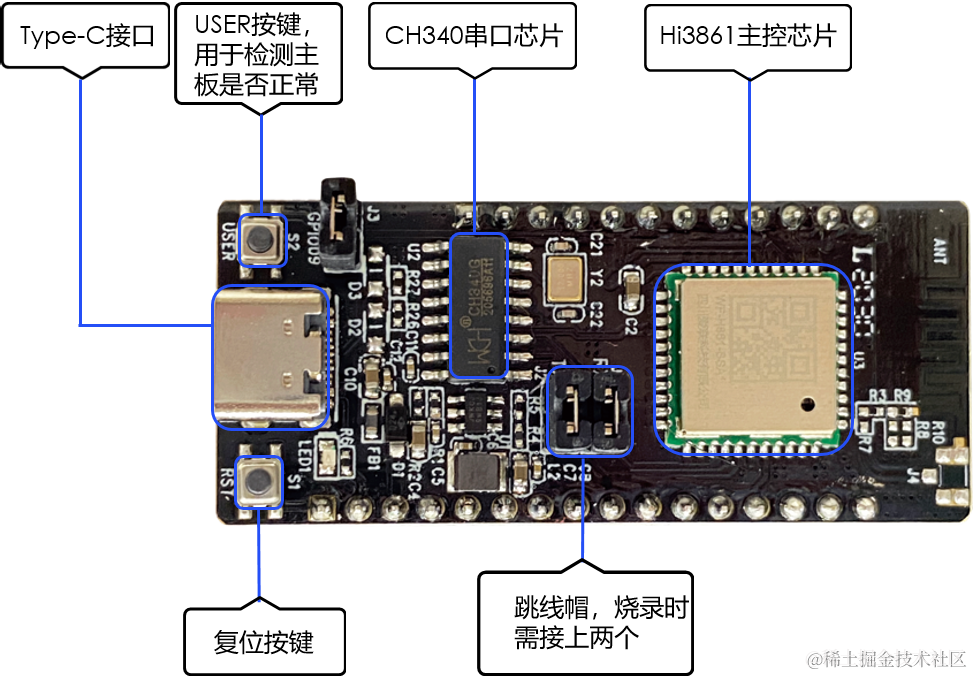
Hi3861開發(fā)板介紹
鴻蒙開發(fā)板Hi3861燒錄報(bào)錯(cuò)?
如何使用 HiBurn 工具燒錄鴻蒙的 .bin 文件到 Hi3861 開發(fā)板
openharmony開發(fā)版 openharmony開發(fā)板
基于鴻蒙系統(tǒng)+Hi3861的WiFi小車開發(fā)
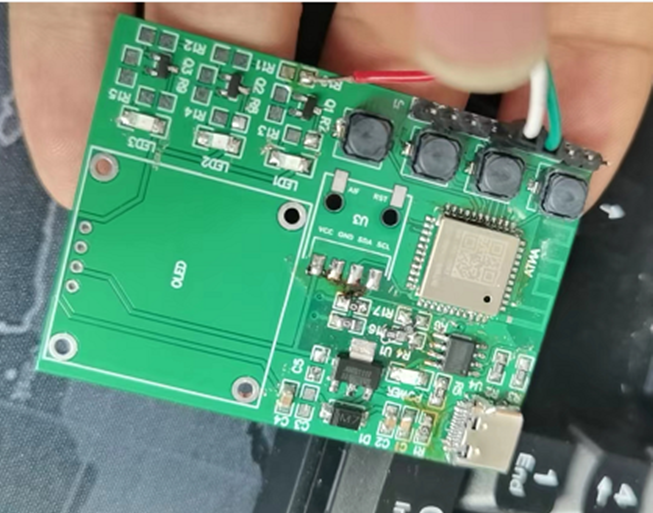
自制Hi3861開發(fā)板(附原理圖和電路圖)
潤開鴻Hi3861開發(fā)板介紹

鴻蒙OpenHarmony【輕量系統(tǒng)編譯】 (基于Hi3861開發(fā)板)
鴻蒙OpenHarmony南向:【Hi3861開發(fā)板介紹】


 工商網(wǎng)監(jiān)
評(píng)論