該項目可用于監(jiān)控油溫和壓力、水溫、電壓、燃油液位。通過Nextion顯示器或諾基亞LCD顯示,以讓你更直觀的了解自己愛車的各項數(shù)值。
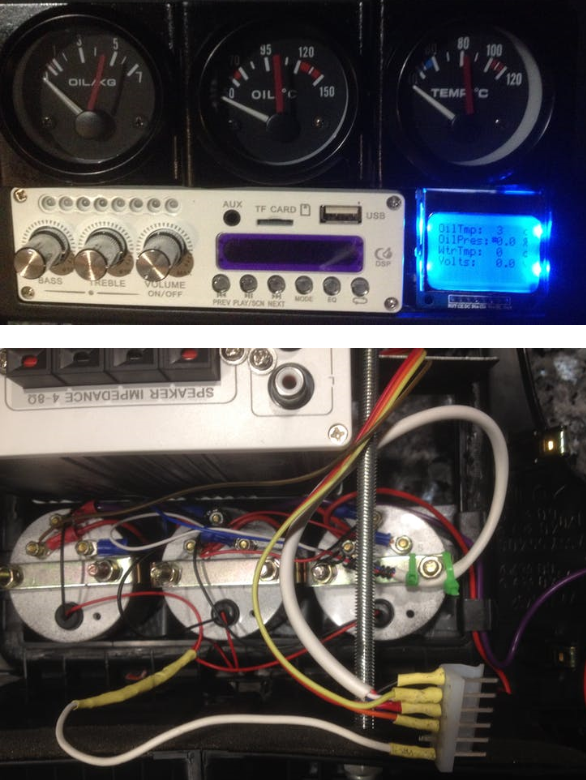
這次的項目中我們使用了一輛舊車,一輛ToyotaMR21990。
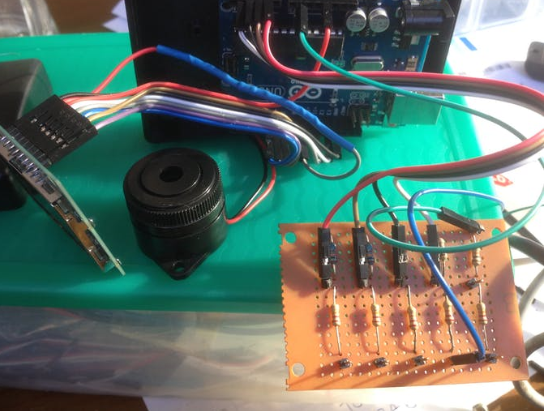
由于沒有OBD端口,并且需要測量油溫和壓力并報警異常值,因此我們決定使用Arduinouno和諾基亞顯示器從安裝在汽車上的電阻傳感器獲取數(shù)據(jù)。
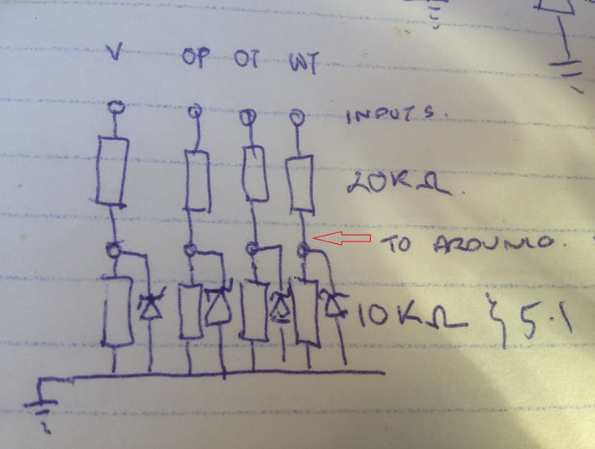
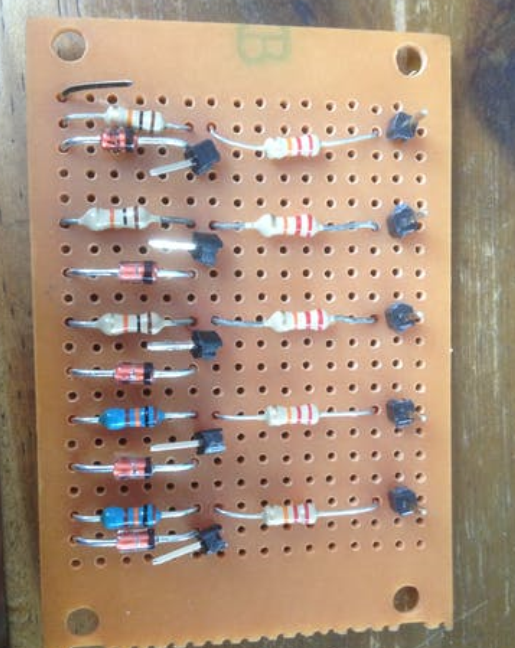
接下來是Arduino輸入板:OP=油壓;OT=油溫;WT水溫;V=伏特
再是用于LCD顯示的程序:
#include "U8glib.h"
#define backlight_pin 9
int piezoPin = 8; //8 digital pin the piezo buzzer is attached for alarm.
const int oiltemppin = A1; //analog pin
const int oilpressurepin = A2; //oil spacer temp and pressure
const int watertemppin = A3; // fitted in water hose after thermostat
const int voltpin = A4; // from acc
const int fuelpin = A5; //from dash fuel gauge
;
int TA = 130; //OilTmp alarm level over 130
float OA = 1.5; //OilPres alarm level under 1.5
int WA = 100; //WaterTmp alarm level over 100
float VA = 12.0; //Volts alarm under 12.0v
float FA = 5; //Fuel alarm under 10
U8GLIB_PCD8544 u8g(13,11, 7, 5, 6); // CLK=13, DIN=11, CE=7, DC=5, RST=6
void draw(void) {
float oiltempres = analogRead(oiltemppin);//resistance value (432.667-Resistance)/1.75
double oiltemp = (432.667 - oiltempres) /1.80;// 50c=347ohm 60=324 70=312 80c= 95c= 110= 120=
float watertempres = analogRead(watertemppin);//resistance value (350.124-Resistance)/1.25
double watertemp = (350.124 - watertempres) /1.25;// 40c=297ohm 50=287 60=276 70=263 80=250 90=233 fan on
float oilpresres = analogRead(oilpressurepin);// 1= 2= 2.5=170 3=195 4=227 5=258 6=280 12.1v
float oilpressure = (98.5 - oilpresres) / -31.098; //
if (oilpressure < 0) {oilpressure = 0;}?
float volts = analogRead(voltpin) / 65.0; //65
float fuel = analogRead(fuelpin) / 2.0;
analogWrite(backlight_pin,20); /* Set the Backlight intensity */
u8g.setFont(u8g_font_profont11); // select font
u8g.drawStr(0, 8, "OilTmp: "); // put string of display at position X, Y
u8g.drawStr(0, 17, "OilPres: ");
u8g.drawStr(0, 26, "WtrTmp: ");
u8g.drawStr(0, 35, "Volts: ");
u8g.drawStr(0, 44, "Fuel: ");
u8g.setPrintPos(55, 8); // set position
u8g.print(oiltemp, 0);
u8g.drawStr(80, 8, "c ");
if (oiltemp > TA) {u8g.drawStr(50, 8, "# ");tone(piezoPin, 500,3000);analogWrite(backlight_pin,250);} //tone(pin,freq,duration)
u8g.setPrintPos(55, 17);
u8g.print(oilpressure, 1);
u8g.drawStr(80, 17, "% ");
if ((oilpressure < OA)&(volts > 13.0)) {u8g.drawStr(50, 17, "# ");tone(piezoPin, 1000,3000);analogWrite(backlight_pin,250);}
u8g.setPrintPos(55, 26);
u8g.print(watertemp, 0);
u8g.drawStr(80, 26, "c ");
if (watertemp > WA) {u8g.drawStr(50, 26, "# ");tone(piezoPin, 1500,3000);analogWrite(backlight_pin,250);}
u8g.setPrintPos(55, 35);
u8g.print(volts, 1);
u8g.drawStr(80, 35, "v ");
if (volts < VA) {u8g.drawStr(50, 35, "# ");tone(piezoPin, 2500,3000);analogWrite(backlight_pin,250);}?
u8g.setPrintPos(55, 44);
u8g.print(fuel, 0);
u8g.drawStr(80, 44, "l ");
if ((fuel < FA)& (oilpressure > 1)) {u8g.drawStr(50, 44, "# ");tone(piezoPin, 3000,1000);analogWrite(backlight_pin,250);}
//used for testing only
//u8g.setPrintPos(60, 44);
//u8g.print(fuel, 0);
//u8g.setPrintPos(30, 44);
//u8g.print(oilpresres, 1);
//u8g.setPrintPos(5, 44);
// u8g.print(watertempres, 0);
}
void setup(void) {
analogWrite(backlight_pin,20); /* Set the Backlight intensity */
}
void loop(void) {
u8g.firstPage();
do {
draw();
} while( u8g.nextPage() );
delay(1000); // update every 1000 = 1 sec
}
由于諾基亞顯示屏變亮(灰色陰影)的問題,導(dǎo)致顯示屏連接不良。最終我決定升級到Nextion顯示器,結(jié)果看起來也更好。
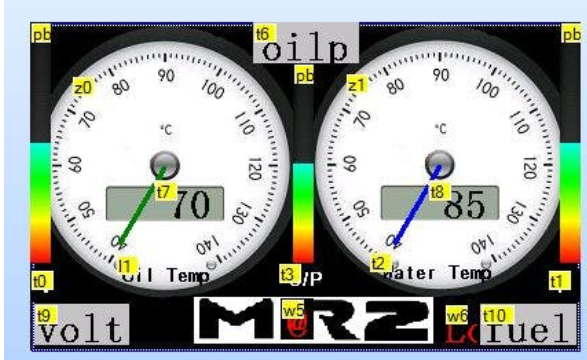
由于Uno只有一個HardwareSerial端口(引腳0/1),并且它與USB-SerialUART共享,因此使用Nextion顯示器調(diào)試項目很痛苦,所以我們轉(zhuǎn)到鏈接中的頁面并按照說明進(jìn)行操作,然后我們串行連接在引腳10,11上。
我的NextionHID的硬件連接:
+5V(紅色):來自arduino板的5V
TX(藍(lán)色):引腳10(SoftwareSerialRX)
RX(黃色):引腳11(軟件串行TX)
GND(黑色):Uno的GND。
顏色是顯示器附帶的顏色,它帶有一個微型分線板上的微型USB連接器。
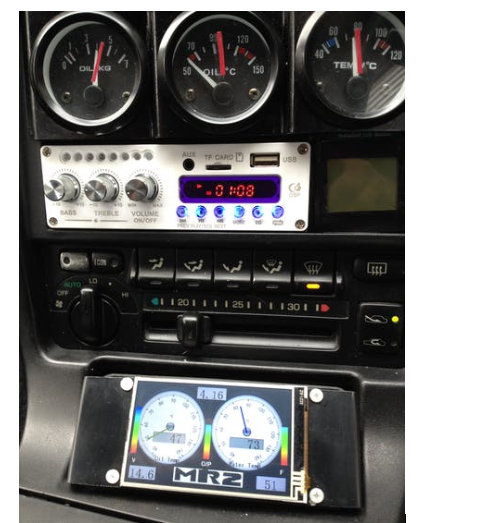
Nextion顯示屏圖片
-
顯示器
+關(guān)注
關(guān)注
21文章
4992瀏覽量
140158
發(fā)布評論請先 登錄
相關(guān)推薦
網(wǎng)絡(luò)攝像頭監(jiān)控的系統(tǒng)優(yōu)勢
如何利用FPGA和嵌入式系統(tǒng)設(shè)計遠(yuǎn)程監(jiān)控系統(tǒng)?
數(shù)字化監(jiān)控系統(tǒng)的特點及功能
怎么實現(xiàn)基于SoPC的汽車安全監(jiān)控系統(tǒng)設(shè)計?
如何利用S3C44B0X和GPRS通訊模塊開發(fā)基于手機(jī)的汽車防盜系統(tǒng)?
請問怎樣去設(shè)計一種汽車安全監(jiān)控系統(tǒng)?
利用FPGA實現(xiàn)汽車系統(tǒng)設(shè)計須遵循哪些步驟?
如何利用IP網(wǎng)絡(luò)實現(xiàn)遠(yuǎn)程視頻監(jiān)控系統(tǒng)?
如何利用藍(lán)牙和無線局域網(wǎng)共同控制監(jiān)控系統(tǒng)?
利用單片機(jī)實現(xiàn)的樓宇監(jiān)控系統(tǒng)
基于GPRS技術(shù)的人防及災(zāi)害警報集中控制系統(tǒng)的設(shè)計與實現(xiàn)
使用Bolt IOT的帶有消息警報的燈光監(jiān)控系統(tǒng)

通過SMS警報進(jìn)行燈光監(jiān)控

Arduino嬰兒汽車警報系統(tǒng)(iCAS)


 如何利用NX4024K實現(xiàn)汽車警報監(jiān)控系統(tǒng)的設(shè)計


評論